www.theorganicprepper.com
How to Cook Food in a Thermos
Author of How to Prep When You’re Broke and Bloom Where You’re Planted online course
Looking for a way to cook food off-grid, but don’t have a fireplace or an indoor method to do so? I have fantastic news. That thermos you have stashed away is good for far more than keeping your coffee hot in a cold house or making homemade yogurt (seriously – yogurt!) If you have a way to boil water and a thermos, you can make all sorts of food.
This is a method made popular by boaters because it uses far less fuel than cooking on a stovetop and reduces the potential for a fire on board. But, it’s the perfect method for land-loving preppers, too. If you have limited fuel or lack an elaborate off-grid cooking set-up, the humble thermos just might be your new best friend. And in these times of outrageous energy bills, having a cooking method that relies on less power is always a good idea.
Here’s everything you need to know about how to cook food in a thermos.
What kind of thermos should you use for cooking?
You can’t just pick up a cheap knock-off in the back-to-school aisle and expect to make meals in it. Those are fine for keeping a meal warm until time to eat, but they cannot handle the boiling water necessary for cooking, nor do they hold enough heat.
While I’m not generally a brand-name shopper, there’s a reason that the Thermos brand has become the ubiquitous name for vacuum bottles. The quality is very high, and you need that kind of excellence for a cooking method on which you plan to depend.
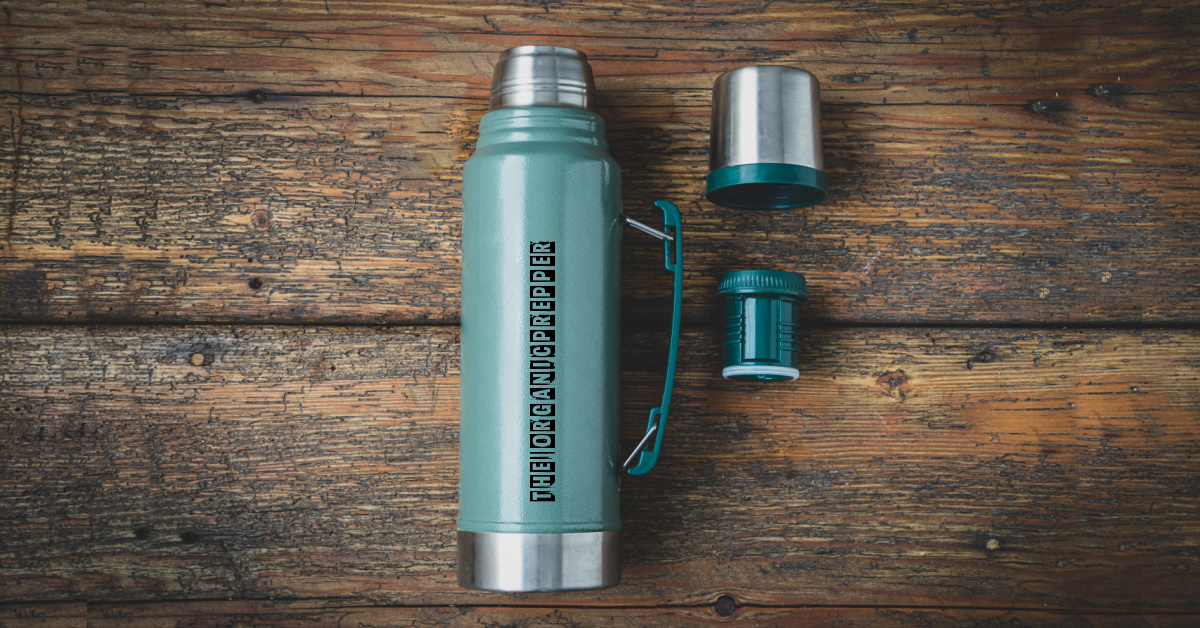
Look for a bottle made from stainless steel. No plastic liners, no glass liners – just steel. I prefer a wide-mouth bottle because it’s way easier to fill and clean, but if you are getting a big bottle, you’ll have to go with a narrow mouth. I use my canning funnel for filling it and a long skinny spatula for getting my food out. A long bottle brush will make clean-up far easier. All of these accessories have many different uses and are widely employed in my kitchen.
This is the thermos I have the best luck with for cooking: the Thermos King 40-ounce jar. For making small amounts of food for just me, this 24-0unce one works well, and it’s what I keep in my bug-out bag. For cooking more food, there is also a 68-ounce thermos.
Be sure to keep your eyes open for good quality thermoses at yard sales and thrift stores. You won’t find them often, but when you do, it’s a real score.
Thermos cooking basics
Okay – you have your thermos, and you have your food. How do you get cooking?
First things first, you need to preheat your thermos. Use your first bit of boiling water to pour into it and warm up the insides. Add the water, put the top on, and wait for five minutes. While you’re waiting, bring more water to a boil and do any required pre-cooking of your food. (See the instructions below for details.)
Next, pour out that water and reserve it for different use.
I like to use my canning funnel to fill the thermos. It really cuts down on spills and reduces the risk of burns from the boiling water. Add your food and your boiling water, and quickly put the lid on.
If you are someplace very cold, you may need to add more boiling water partway through your cooking time. Dump your contents out into a bowl, drain it, then put it back in the thermos with more boiling water.
Do NOT take the lid off to check on things. You’ll let out the heat that is cooking your food!
That’s all there is to it! Next, we’ll get into specifics.
How to cook rice in a thermos
Rice is one of the easiest things to cook in a thermos. There are three different kinds of rice you might be cooking. Here are the instructions for each. I always, always, always wash rice before cooking it. If you have the extra water, you should too. You can use the water you’re preheating the thermos with to do so. Discard any water you’ve used to wash rice or use it for sanitation.
Instant Rice: Preheat your thermos, then put equal parts of instant rice and boiling water in. Be sure to leave about an inch at the top of the thermos for the rice to expand. Pop the lid on, and you have rice in 30 minutes! You don’t have to use it right away. Your rice will stay warm for up to 8 hours in the thermos.
White Rice: Preheat your thermos and rinse your rice. On your stove, bring 1 cup of rice and 1.5 cups of water to a boil and simmer for 5 minutes. Empty the water from your thermos, then refill it with your simmering rice and water. Put the lid on and let it sit for 2 hours. If you plan to leave it for longer than 4 hours, reduce the amount of water by a quarter cup so it doesn’t overcook.
Brown Rice: Preheat your thermos and rinse your rice. On your stove, bring 1 cup of rice and 1.5 cups of water to a boil and simmer for 5 minutes. Empty the water from your thermos, then refill it with your simmering rice and water. Put the lid on and let it sit for 4-5 hours.
How to make soup in a thermos
Here are two different soups you can make easily.
Chicken Noodle Soup
Preheat your thermos.
Bring 2 cups of chicken broth to a boil on the stovetop.
Place 1 cup of dry noodles, 1 tbsp minced onion, 1 tsp garlic powder, and 1 tsp of parsley in your thermos.
Pour the boiling broth into your thermos, then put the lid on.
Let your thermos sit for about 4 hours.
Split Pea Soup
Preheat your thermos for at least 5 minutes.
Meanwhile, on the stovetop, place 1 cup of dried, rinsed split peas into a pot, along with diced ham (fresh or freeze-dried), 2 tbsp minced onion, 1 diced carrot (or 1/4 cup freeze-dried carrot), 2 bay leaves, 1/2 tsp sage, 1/2 tsp thyme, salt, and pepper.
Bring the mixture to a boil for 3 minutes, then pour it into the thermos.
Put the lid on and let it sit for 4-10 hours.
How to make oatmeal in a thermos
Try this easy breakfast even when the power is on!
Preheat your thermos.
Add 1/2 a cup of rolled oats, 1/2 cup of dried fruit, 1 tsp of cinnamon, 1 tbsp of brown sugar, and a teeny dash of salt to the thermos.
Bring 1 cup of your favorite milk (or water) to a boil, then pour it into the thermos.
Put the lid on and let it sit for 30 minutes to an hour. Stir in any extra liquid and enjoy.
How to prepare freeze-dried emergency food in a thermos
Here’s a great way to prepare those freeze-dried meals from your buckets while using minimal energy and fuel.
Preheat your thermos.
Check the directions on your package of freeze-dried food to see how much water to add and bring that amount to a boil.
Add the contents of your food package to the thermos, then pour the boiling water in. Be sure to leave room for the food to expand as it’s reconstituted.
Put the lid on and let it sit for about an hour and then enjoy your hot meal.
How to cook potatoes in a thermos
Got potatoes but no way to cook them? Try this!
Preheat your thermos.
Cut your potatoes into chunks, then add them to water in a pot on the stove.
Bring your potatoes and water to a boil for 5 minutes, then pour the whole thing into the thermos.
Put the lid on and let it sit for 2-3 hours.
At serving time, you can drain off the liquid or incorporate it to make mashed potatoes. I like to season my potatoes with freeze-dried butter powder, salt, pepper, and parsley.
How to soak and cook dried beans in a thermos
If you’ve got dried beans but are loathe to use your precious fuel to cook them for hours, try the thermos method, which takes 15 minutes of actual cooking time.
First, preheat the thermos.
Sort and rinse your beans, then add them to water on the stove. Bring this to a boil for 5 minutes, then pour the beans and water into your thermos.
Allow this to sit for two hours. Now your beans are pre-soaked.
Change the water and bring your beans and new water to a boil for ten more minutes.
Pour this back into your thermos and allow it to sit for three more hours. Make sure you’ve left room for expansion. Your beans should be tender and ready to be seasoned.
Additional thermos cooking resources
The best place I’ve found for advice on this subject is the website TheBoatGalley.com. You can also find recipes on the official Thermos website.
Practice, practice, practice.
Thermos cooking is an art form. The first few attempts may not be successful right and may require further cooking or tweaking. As with any preparedness skill, it’s essential to practice and get through the trial and error phase before you really need to use your gear during an emergency.
Have you ever tried to cook food in a thermos? How did it go? Do you have any tips? Are there foods besides those listed here that work well in a thermos? Let’s talk about it in the comments.
About Daisy
Daisy Luther is a coffee-swigging, adventure-seeking, globe-trotting blogger. She is the founder and publisher of three websites. 1) The Organic Prepper, which is about current events, preparedness, self-reliance, and the pursuit of liberty; 2) The Frugalite, a website with thrifty tips and solutions to help people get a handle on their personal finances without feeling deprived; and 3) PreppersDailyNews.com, an aggregate site where you can find links to all the most important news for those who wish to be prepared. Her work is widely republished across alternative media and she has appeared in many interviews.
Daisy is the best-selling author of 5 traditionally published books, 12 self-published books, and runs a small digital publishing company with PDF guides, printables, and courses at SelfRelianceand Survival.com You can find her on Facebook, Pinterest, Gab, MeWe, Parler, Instagram, and Twitter.
The post How to Cook Food in a Thermos appeared first on The Organic Prepper.