ridermagazine.com
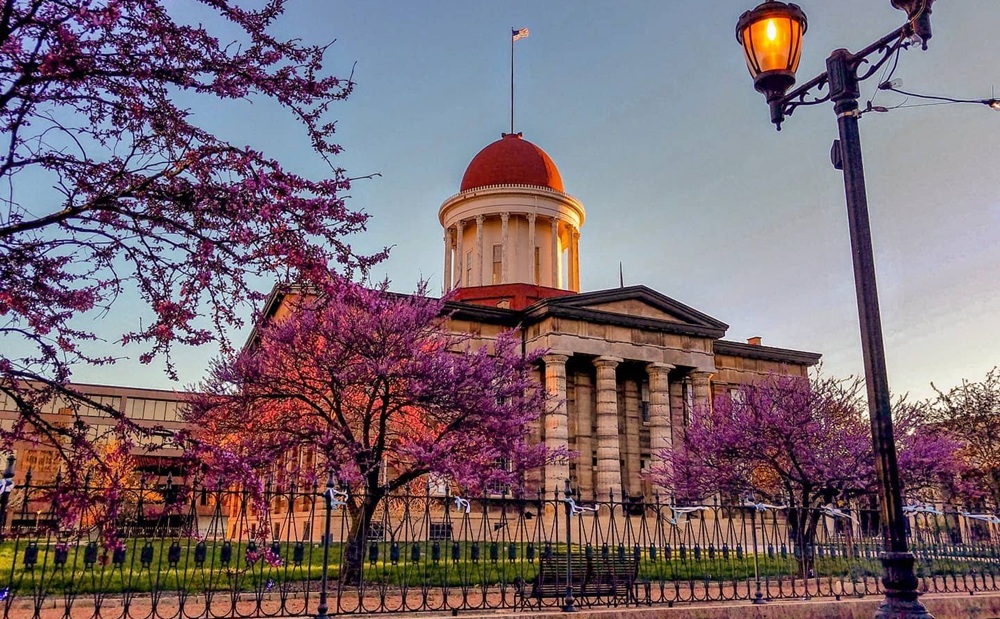
The Land of Lincoln—Springfield, IL
For many travelers, Springfield, Illinois, is synonymous with one name: Abraham Lincoln. The city where Lincoln lived, practiced law, raised his family, and launched his political career preserves his legacy at nearly every turn. But for motorcyclists, Springfield also represents an intersection of American roads, history, and the timeless appeal of exploring somewhere new on two wheels.
Located in the heart of Illinois, Springfield sits along the legendary Route 66 and makes an ideal stop for riders traveling across the Midwest. It is a place where you can spend the morning walking through history, the afternoon chasing backroads through farmland and small towns, and the evening enjoying local food and conversation with fellow travelers.
Following Lincoln’s Footsteps
Before he became the 16th president of the United States, Abraham Lincoln was a Springfield resident for nearly a quarter century. The city preserves that history through a collection of sites that allow visitors to experience Lincoln’s life beyond the familiar images found in textbooks.
A visit should begin at the Abraham Lincoln Presidential Library and Museum, where interactive exhibits tell the story of Lincoln’s rise from a frontier lawyer to one of America’s most consequential leaders. Nearby, the Lincoln Home National Historic Site preserves the neighborhood where Lincoln lived with his wife, Mary Todd Lincoln, and their children before moving to Washington, D.C.
Many of Springfield’s historic attractions are clustered close together, making it easy to park the bike and explore on foot. The downtown area has a relaxed pace, with historic buildings, brick streets, restaurants, and plenty of opportunities to take in the city without feeling rushed.
Another worthwhile stop is the Lincoln Tomb at Oak Ridge Cemetery. The imposing monument marks the final resting place of Lincoln, his wife, and three of their children.
Cruising the Mother Road
Route 66 is one of the biggest reasons Springfield belongs on any motorcyclist’s travel map. Established in 1926, the Mother Road helped define the American road trip, connecting Chicago and Los Angeles through a ribbon of diners, motels, gas stations, and small towns. Springfield became one of its important stops, and today the city celebrates that heritage with attractions, murals, and roadside landmarks.
A ride through Springfield is not complete without paying homage to Route 66 icons such as Cozy Dog Drive In, the birthplace of the corn dog and a longtime stop for Route 66 travelers. The city also celebrates the Mother Road through Route 66-themed attractions and exhibits, including the Route 66 Experience at the Illinois State Fairgrounds.
Great Roads Beyond the City
While Springfield itself is filled with things to see, the best motorcycle destinations often use a town as a basecamp. From Springfield, riders can head out into central Illinois where quiet county roads wind through farmland, historic communities, and scenic stretches along the Sangamon River.
One enjoyable loop is a ride north toward Lincoln’s New Salem State Historic Site. The reconstructed 1830s village preserves the community where Lincoln spent several formative years before moving to Springfield. The ride there offers a pleasant escape from city traffic and provides a glimpse of the landscape that shaped young Lincoln.
Another option is exploring the roads surrounding Lake Springfield and the nearby parks. The area provides opportunities for a slower-paced ride with plenty of places to stop, stretch your legs, and enjoy the outdoors.
Illinois may not have mountain switchbacks or sweeping coastal highways, but its charm comes from discovering the small roads between destinations where the scenery changes slowly and every town has a story.
Eat Like a Local
Every great motorcycle destination needs memorable food, and Springfield has a specialty riders should not leave without trying: the horseshoe sandwich.
Created in Springfield, the horseshoe is a uniquely Midwestern creation, traditionally an open-faced sandwich topped with meat, a mountain of fries, and cheese sauce. It is hearty, filling, and exactly the kind of meal that feels earned after a day in the saddle.
Beyond the horseshoe, Springfield’s food scene includes classic diners, breweries, coffee shops, and locally owned restaurants that give riders plenty of options after parking the bike for the evening.
A Weekend Worth the Ride
Springfield is not a destination that demands a checklist. It is a place to wander. Spend a morning following Lincoln’s footsteps. Ride a section of Route 66. Stop for lunch at a roadside landmark. Take the long way back through the countryside. Sit outside with a cold drink and talk motorcycles with strangers who quickly become friends.
Start planning your weekend ride to Springfield, Illinois.
Travel Resources
At a Glance
Location: Springfield, IllinoisDistance: Best experienced as a weekend destination with 50–150 miles of surrounding day ridesRide Time: 1–3 daysBest Direction to Ride: Approach via Historic Route 66 from the north or southSkill Level: BeginnerBest Bike Type: Touring, cruiser, sport-touring, adventure, or standard
Road Conditions
Springfield and the surrounding region offer well-maintained paved roads that are ideal for relaxed touring. Historic Route 66 passes directly through the city, while lightly traveled county highways radiate into the surrounding farmland. Riders can expect gentle sweepers, long straightaways, and wide-open visibility rather than technical curves or dramatic elevation changes. Traffic is generally light outside the city center, although downtown and the Illinois State Fairgrounds become busier during festivals and fair season. Deer are common on rural roads during dawn and dusk.
When to Travel
Late April through early June and September through October offer the most comfortable riding weather, with mild temperatures and colorful scenery. Summer is warm and humid but brings Route 66 events, outdoor festivals, and the Illinois State Fair in August. Winters can bring snow and icy conditions that limit riding opportunities. Cell service is excellent throughout the area, making navigation easy, but riders should still pack layers, as Midwest weather can change quickly throughout the day.
Road Food
No visit to Springfield is complete without trying the city’s famous horseshoe sandwich—an open-faced meal piled high with fries and cheese sauce that has become a local institution. Cozy Dog Drive In is a must-stop for Route 66 travelers and claims to be the birthplace of the corn dog on a stick. Downtown Springfield also offers excellent barbecue, breweries, coffee shops, and classic diners that make perfect lunch stops before heading back onto the road.
Where to Stay
Springfield offers accommodations for every style of traveler. Historic downtown hotels place riders within walking distance of Lincoln attractions, restaurants, and nightlife, while familiar chain hotels along Interstate 55 provide convenient parking and easy highway access. Riders looking for a classic Route 66 experience should consider Route 66 Hotel and Conference Center, which celebrates the Mother Road with vintage décor and motorcycle-friendly amenities. Several campgrounds and state recreation areas near Lake Springfield also provide scenic overnight options.
Attractions
Route 66 attractions and roadside landmarks
Lincoln historic sites
Small-town diners and cafes
Scenic roads around Lake Springfield and the Sangamon River area
Road food
Horseshoe sandwich
Cozy Dog Drive In
If You Have More Time
Springfield makes an excellent jumping-off point for exploring central Illinois. Ride the original alignments of Route 66 north toward Bloomington or south through Litchfield and Staunton, discovering restored gas stations, vintage motels, and classic roadside Americana along the way. A leisurely ride west into the Illinois River Valley reveals quiet farming communities and scenic river roads, while a trip to Lincoln’s New Salem offers both a rewarding ride and a deeper look at the president’s early life. For Route 66 enthusiasts, Springfield is one of the best places to begin a multi-day journey along Illinois’ historic stretch of the Mother Road.
More Information
Visit Springfield, Illinois
Enjoy Illinois travel guides
Route 66 travel resources
The post The Land of Lincoln—Springfield, IL appeared first on Rider Magazine.