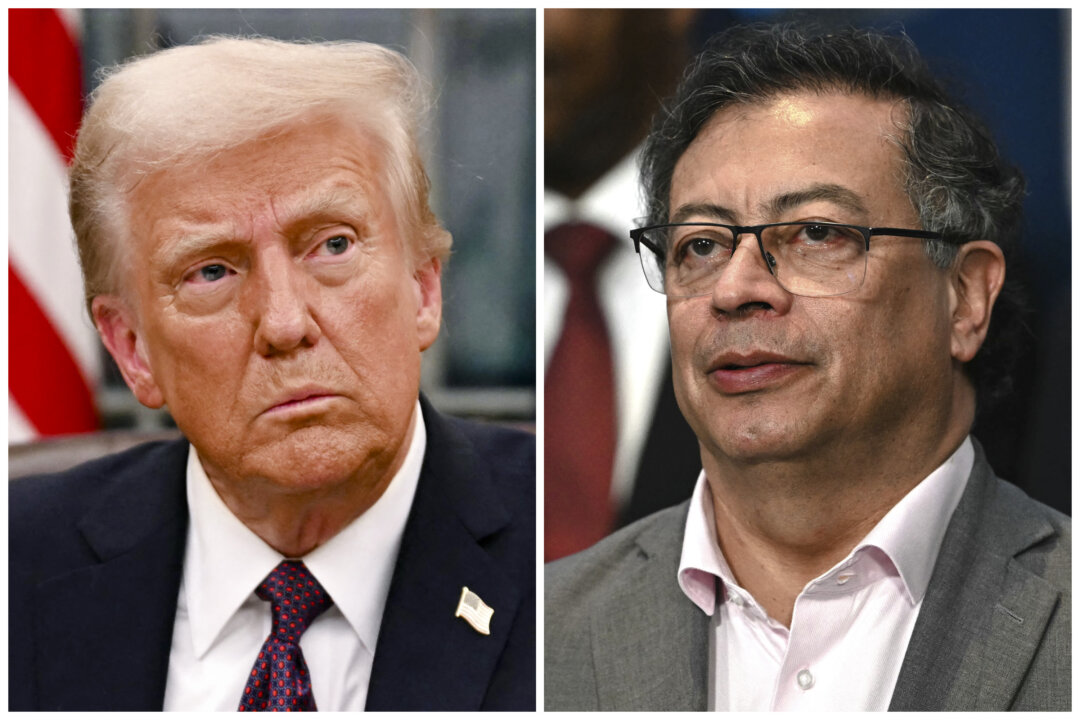
YubNub Social YubNub Social
    #freespeech #virginia #astronomy #nightsky #deepstate #novac #terrorism #trafficsafety #underneaththestars #treason #stargaze #assaultcar #carviolence #stopcars #crockettpark
    Advanced Search
  • Login
  • Register

  • Day mode
  • © 2025 YubNub Social
    About • Directory • Contact Us • Developers • Privacy Policy • Terms of Use • shareasale • FB Webview Detected • Android • Apple iOS • Get Our App

    Select Language

  • English
Install our *FREE* WEB APP! (PWA)
Night mode toggle
Community
New Posts (Home) ChatBox Popular Posts Reels Game Zone Top PodCasts
Explore
Explore
© 2025 YubNub Social
  • English
About • Directory • Contact Us • Developers • Privacy Policy • Terms of Use • shareasale • FB Webview Detected • Android • Apple iOS • Get Our App
Advertisement
Stop Seeing These Ads

Discover posts

Posts

Users

Pages

Blog

Market

Events

Games

Forum

History Traveler
History Traveler
6 w

4 Assyrian Tactics That Ensured the Loyalty of Their Subjects
Favicon 
www.thecollector.com

4 Assyrian Tactics That Ensured the Loyalty of Their Subjects

    Over a thousand years of Assyrian history, the city-state turned empire conquered many settlements and kingdoms. Their success compared to other contemporary states was largely due to their decisive and brutal approach to suppressing those they defeated. Assyrian monarchs utilized a variety of strategies that could be considered torture, which they celebrated in dramatic fashion in their annals and wall reliefs.   1. Treatment of Fallen Enemies Relief showing Ashurbanipal in his chariot hunting lions, North Palace of Nineveh, c. 645-635 BCE. Source: The British Museum   After the Assyrians fought enemy armies, they routinely tortured the survivors. Ashurnasirpal II proudly stated that he “flayed as many magnates as had rebelled against him” and draped their skins over a pile of dead bodies as well as hanging some on stakes. Such behavior was commonplace and many other kings recorded similar actions such as Shalmaneser III, Tiglath-Pileser III, Esarhaddon, and Ashurbanipal.   The precedent for tormenting prisoners was firmly set by the start of the Neo-Assyrian Empire and began escalating in intensity from the reign of Ashurnasirpal II and particularly under the Sargonid kings. Further violence was implemented to put off other potential rebels who might resist Assyrian control. Common features of Assyrian torture after a battle included the piling of deceased bodies, the impalement of bodies, the displaying of severed heads, amputating body parts of those still alive, and other forms of permanent disfigurement such as the gouging of eyes.   Sargon II with a dignitary from the walls of Dur-Sharrukin, c. 721-705 BCE. Source: Louvre   Civilians were increasingly targeted by later kings and bodies were often buried in mass graves in the neighboring countryside. Under Sargon II prisoners had their lips pierced and were tethered via the piercing. Sennacherib brought in a particularly horrific form of abuse whereby prisoners had their testicles cut off and what remained was twisted or even pulled until their insides came out. In addition to the living or even recently deceased, Ashurbanipal persecuted the long-dead ancestors of the Elamites. The Assyrian ruler desecrated the graves of Elamite kings and brought their bones back to Assyria as plunder.   2. Taking of Hostages Scene from the Black Obelisk of Shalmaneser III depicting a subjugated ruler, possibly the king of Israel from Nimrud, c. 825 BCE. Source: British Museum   Many of those left alive after the onslaught of battle were taken back to Assyria as captives, which was practiced by many kingdoms in the ancient Near East. This was a tactical decision and hostages were used to strengthen the Assyrian state in a variety of ways. The Assyrian word for hostage was līţu and Ashurnasirpal II even titled himself şābit līţu which translates to “Conqueror of the Hostages.” Subsequently, this title was assumed by many of his successors.   Elites and members of the upper class of society could be used as leverage when establishing treaties in favor of Assyria with potential enemies. In many cases, the subordinate state would send Assyria hostages as part of treaties, who would act as insurance and project a sense of goodwill between the kingdoms. Many of the sons of other kings were raised at the Assyrian court, not only giving the Assyrian leverage, but they raised the princes, who would be kings, to favor Assyria.   Victory Stele of Esarhaddon (left), Ushankhuru (middle) and unknown king, possibly Baal I of Tyre (right) from the Sam’al, modern-day Turkey, c. 670 BCE. Source: Wikimedia Commons   The daughters of kings were also occasionally sent to the Assyrian palace to become concubines or wives. Again, this initiated strong connections between various royal families, ensured loyalty from those conquered by Assyria and even brought in money to Assyria as they came with dowries.   In these specific cases, the hostages were treated well, but ultimately were still taken from their homelands with the potential to be made a spectacle of and killed if their families upset the Assyrian king. The same treatment cannot be seen in the lower class population as they were deported to wherever the empire needed them most.   3. Mass Deportations Close up section of the Lachish Reliefs showing deported peoples moving out, from the South West Palace of Nineveh, c. 700-692 BCE. Source: British Museum   Prisoners from conquered lands were brought back to Assyria to ensure the increasingly larger state could effectively control its empire. For example, some surviving soldiers were incorporated into the Assyrian army. They were employed in the most strenuous work such as construction or farming. If people had a trade, they could be forced to use their skill in service of their conquerors.   The deportations aimed at causing the complete upheaval of entire populations. They were settled in areas that could have totally new climates, food, and even diseases, often in desolate places where the farming they were sent to do was near impossible. Additionally, these new inhabitants were afforded very little in terms of housing. While families could stay together, they were often fed just grain while they were forced to work long days in the fields.   Furthermore, these new settlements were weakened as artisans, workmen, and other citizens of higher education had been removed, undermining social structures, which meant that they were far less likely to resist Assyrian rule.   Siege scene from reliefs of Ashurnasirpal II showing a battering ram, from the North West Palace at Nimrud c. 865-860 BCE. Source: British Museum   As well as the physical limitations of an uprising, there was also a lack of morale caused by their complete separation from their homes and old lives. Likewise, in ancient Mesopotamia, religion was heavily linked to location. Therefore, another tenet of torture manifested in the fact that these groups were hundreds of miles from their gods. At a time when religion and active worship of deities were such an integral part of everyday life, this must have been a devastating blow to those who had quite literally lost everything.   The “Assyrian Exile” or the “Assyrian Captivity” was perhaps the largest deportation, which saw the Israelites deported en masse. The Assyrian Captivity was mostly at the hands of Tiglath-Pileser III, Shalmaneser V, and Sargon II, although many Assyrian rulers fought with and subjugated Israel. Towards the end of Shalmaneser V’s reign, Israel rebelled against Assyria and a three-year war ensued. The Assyrian response was initiated by Shalmaneser V and finished by his successor, Sargon II, who claimed to have deported over 27,000 Israelites.   The Second Book of Kings in the Bible describes how Assyria came to Israel and cast out many Israelites and also moved other groups of people into Israel. 2 Kings 17 explains that the people of Israel had been practicing religion in a way that displeased the gods with idol worship and other customs that their God had banished from the land. Moreover, in Hosea 13:16, it is said that the Assyrians killed children and “ripped open” pregnant women. It is not certain whether this was meant literally or figuratively, but there are records of the Assyrians perpetrating similar actions in Elam.   4. Religious and Ideological Warfare Altar of Tukulti-Ninurta I from Ashur, c. 1243-1207 BCE. Source: Ancient Orient Museum, Istanbul   Religious violence in the ancient Near East was complicated and often frowned upon by the Assyrians, a notable example being the decimation of Babylon and its religious sanctuaries at the hands of Sennacherib. However, with smaller kingdoms, local deities were frequently mistreated to destroy morale in the hopes this would prevent further revolts. Furthermore, if the Assyrians were able to wreak havoc on a settlement or population, the inhabitants would often conclude that their gods had abandoned them.   However, in many respects, Assyria was deferential to many religions. Most civilizations believed in a polytheistic structure of deities and therefore that the native gods of other cultures did exist and in a way interacted with each other. When a subjugated state broke a treaty, the Assyrians would invoke deities from both sides to punish them.   Illustration of Marduk battling the Gryphon from Monuments of Nineveh, plate 5, 1853. Source: Wikimedia Commons   Idol worship was a common practice as part of many of the varied religious systems across contemporary Mesopotamia and could be utilized in warfare. The term “godnapping” is often used by historians, which refers to the practice of taking the statues of gods from defeated states back to the homeland of the victorious forces. It was common belief that some part of the deity lived in their idols and so if their idols were taken, the remaining inhabitants had lost their safety and security.   In Shalmaneser III’s Black Obelisk inscription, he describes how he “uprooted” the king’s sons, daughters, and gods and brought them back to Assyria. Likewise, this practice was certainly intended to shame, embarrass, and provide the ultimate insult to the conquered civilizations. In addition, this would deprive the gods of important rituals that were performed to honor them and further separate the people from cosmic protection.   Destruction of Babylon by Sennacherib from Hutchinson’s History of the Nations, by A. C. Weatherstone, 1915. Source: Wikimedia Commons   Worse still than kidnapping was the complete destruction of religious idols. This was far less common due to a general fear of offending the gods, but was enacted from time to time. Sargon II employed this terror tactic and stated that it was to guarantee Assur’s ultimate power across the ancient Near East, by which he implied the supremacy of Assyria.   Sennacherib’s treatment of Babylon is the most notable example of the destruction of deities. Incredibly, Sennacherib recreated the ancient flood myth when he destroyed Babylon and all its religious sites by cutting new pathways for the Euphrates so that it swept away the urban area of the city.   Sennacherib’s devastation of Babylon caused significant unrest in Assyria, prompting the king to defend his actions through a myth in which the chief Assyrian deity, Assur, put Marduk on trial. He further disrespected Babylon by proclaiming that Assur had replaced Marduk as the central figure of the Babylonian New Year festivities, likening Babylon to the chaotic goddess Tiamat, and associating himself with Marduk.   Might and Divine Right Wall relief depicting the fall of a city to the Assyrians, Neo-Assyrian, c. 7th Century BCE. Source: British Museum   Assyria’s constant and at many times unwavering success would have illustrated to people across Mesopotamia that Assyria was blessed by the gods and was fully supported by powerful cosmic forces. An enormous part of the structure of Assyrian beliefs was the duty of the king to expand territory on behalf of the gods, a divine instruction that ensured legendary kingship. Consequently, this message of absolute celestial power worked to spread fear and also manifested in a war against other gods on occasion.
Like
Comment
Share
History Traveler
History Traveler
6 w

What Are the 7 Most Bizarre Ancient Inventions?
Favicon 
www.thecollector.com

What Are the 7 Most Bizarre Ancient Inventions?

  Throughout history there have been strange and bizarre inventions. Some were useful, such as glasses to drink from or items to help win a war, while others had a more puzzling and bizarre purpose. Many of the seven items on our list also carry an aura of mystery around how they were actually made.   Greek Fire The Greek Fire was used for the first time at the 674-678 Arab Siege of Constantinople, illustrated by Graham Turner. Source: thebyzantine-blogger.blog   As far as bizarre ancient inventions go, this weapon is one of the top contenders. This is because the formula of Greek fire remains secret to this day. There are certainly assumptions made by modern day historians, but it is still just a guess. Reading ancient texts about how this fire acted can give some idea of its composition. Water did not put it out; it would burn even in the water, although some texts claim that it was ignited by water, and it was extinguishable by sand or vinegar.   It was a liquid and launched in pots like an ancient Molotov Cocktail, and when it hit its target, it would make a loud noise and produce smoke. Some popular thoughts on what composed the recipe for the fire includes things like saltpeter, quicklime, and calcium phosphide.   The Lycurgus Cup The Lycurgus cup in The British Museum collections. Source: The British Museum   The Lycurgus Cup dates back to the 4th century CE. It is engraved with a scene depicting King Lycurgus of Thrace, which is how the cup was named. It might seem like a normal cup, and could otherwise be lost in the vast collections of the British Museum, except for the unique way in which it was crafted. The cup is made from dichroic glass, which has tiny metal pieces of gold and silver within its layers. This can cause the glass to refract different colors in the light. The color shifts from green to red, to purple depending on the location of the light. While dichroic glass is still used today, the particular skills used to make this cup in ancient times makes it a unique work of art.    The Ancient Chinese Seismoscope Replica of Zhang Heng’s seismoscope. Source: Amusing Planet   While many may think of a seismometer as a recent invention, different versions of seismometers have been around for years, all the way back to ancient China. This one was invented by Zhang Heng in 132 CE, which is where the name comes from. The reason behind this was that China is in a highly seismic area. There is documentation claiming that an earthquake in 780 BCE changed the flow of three rivers.   The bronze jar itself looks more like a jug to hold wine, with eight dragon heads seeming to scowl down at eight frogs with their heads tilted up and their mouths open. It almost looks more like a decorative piece than one with a scientific purpose. This item worked in a similar way to other pendulums. The ball would sway with the force of an earthquake, even those that couldn’t be felt—and pop out from one of the dragon heads into the frog, which helped indicate the direction of the quake.   The Roman Dodecahedron A Roman dodecahedron on display at a museum. Source: Norton Disney History and Archaeology Group   Dated back to the 2nd-4th centuries CE, the Roman dodecahedron is an object made of copper. It is not a singular invention, but rather the name for a group of similar ancient artifacts that have been found throughout Europe. The question is, what were they used for? These inventions contain 12 sides with holes and knobs and have puzzled scientists, archaeologists, and historians for generations. Some wonder if it was used to help knit cords and other materials, while others believe it is linked to Roman superstition or religious practices.   The Baghdad Battery Baghdad Battery. Source: Smith Museum   Also called the Parthian or the Babylonian Battery, this item has captured the interest of historians, archaeologists, and inventors for centuries. It was invented thousands of years ago, between 250 BCE to 250 CE, and was discovered in Khujut Tabu’a, near Ctesiph in 1938. The piece is a clay jar with a metal cylinder and iron rod. Was this an early example of electric technology? It has sparked some debates. There are some disputes in the exact use of the object as a battery. Some say that it was not truly used that way and was more for religious reasons or as a mere storage container. Unfortunately, with no images or written record it is hard to say for sure what it was used for. However, during tests, the jar produces 1.1 volts when it is filled with vinegar or other electrolytic solutions.   The Damascus Steel Sword Damascus steel sword from 13th-century Persia. Source: Wikimedia Commons   These swords, which date back as far as the 1st century BCE, are supposedly named after the location where they originated, in Damascus, Syria. Throughout history they were also made in the East in several areas, including India and Sri Lanka. Part of the beauty of the swords was the waterfall effects within the steel, giving it a naturalistic look. According to legend, these swords were sought after as they could cut through a rifle barrel in an easy swipe, and so sharp that a hair falling on the blade would be cut in half.   The creation of the blade to give it strength, retain its sharpness, and be flexible was revolutionary for the time in which it was made. While modern tests give some idea of how these swords were made, any attempts to reserve-engineer the process have been largely unsuccessful. Modern “Damascus steel” knives are made to look like them, although they are not true Damascus steel blades.   The Phaistos Disc Phaistos Disc, Side A. Source: Wikimedia Commons   From the island of Crete, Greece, the Phaistos Disc was found in 1908 by Luigi Pernier, an Italian archaeologist. It dates back to the Minoan Bronze Age, and was created from a fine-grain clay that was later fired after individual stamping. Bizarrely, the clay used to create it came from somewhere else completely. The actual origins of the disc are not entirely clear.   We also do not know what its strange symbols represent. There are 45 different signs on its surface that occur in different repeating patterns, making 242 total markings; 123 on one side and 119 on the other. Outside of these stamped signs are marks that were scored into the clay, likely with a stylus. Like many other pieces of ancient pottery and sculpture, this has led many to attempt – unsuccessfully – to decipher the unique code, and work out whether or not it is meant to be an alphabet or a logography.
Like
Comment
Share
History Traveler
History Traveler
6 w

The Mysterious Tiwanaku Civilization & the Ruins They Left Behind
Favicon 
www.thecollector.com

The Mysterious Tiwanaku Civilization & the Ruins They Left Behind

  The people of Tiwanaku built a grand city several hundred years before their more famous Inca successors. High up on the barren Altiplano, its ruins are an atmospheric and fascinating complex of courtyards, pyramids, and masterful stonework. This civilization remains a mystery, however, with many key questions unanswered. Archaeologists are unsure what language they spoke or if they have living descendants today. It is not even clear how their society functioned and whether they expanded through imperial conquest or by peaceful cultural hegemony.   Andean Civilization Before the Tiwanaku Carved heads in one of the sunken courtyards, François Bianco, 2014. Source: Wikimedia Commons   Before the conquistadors reached the Americas, indigenous civilizations developed across the Western hemisphere. They built cities in places as dispersed as the midwest of the present-day USA, Colombia, and (as archaeologists are increasingly realizing) even the Amazon rainforest. There were, however, two particular regions that gave birth to a succession of large cities and sprawling empires—Mesoamerica and the Andes. Each has well-known civilizations associated with it: the Aztec and the Maya in Mesoamerica and the Inca in the Andes. Yet these, with the exception of the Maya, were relatively short-lived and only came after a succession of predecessors. Although both cultures built the biggest empires that their regions had ever seen, and they were interrupted when the Spanish reached the Americas, neither lasted much more than one hundred years.   The earliest known evidence of humans quarrying to make tools in the Andean region dates back to 12,000 BCE. By 3500 BCE, people had begun to settle in sedentary communities and adopt agriculture at Sechin Bajo on the central coast of Peru. This lifestyle was taken up by numerous other peoples over the next 500 years, including those at a place named Jisk’a Iru Muqu. The transition away from a mobile existence of hunting and gathering is usually considered to be one of the first steps towards the development of complex civilization. Intriguing new evidence from another early Peruvian site, Caral-Supe, suggests that fishing can take the place of farming in this process. These first steps towards organized urban living created the foundations used by numerous civilizations to flourish over the following millennia.   One of the glyphs that make up the Nazca Lines. Source: PBS   Among the most famous are the Nazca, who occupied the coastal deserts of southern Peru. It was this civilization that created the famous lines depicting animals and mythical beings that can only be properly viewed from the air. There were plenty of others, however, whose achievements were no less impressive. Beginning around 3500 BCE, and lasting almost 2,000 years, Caral-Supe may have incorporated as many as thirty different cities. This made their territory perhaps the most densely populated place on earth at the time.   The Valdivia culture, who lived on the coast of what is today Ecuador, created a currency system based on the spondylous shells they pulled from the sea. This seems to have been adopted as far north as Mexico and as far south as Chile. Perhaps the largest of Tiwanaku’s predecessors were the Chimu. This empire was built on a highly stratified and bureaucratic form of social organization, allowing it to control 1,000 kilometers (600 miles) of Peru’s coastline.   Who Were the Tiwanaku? The exterior wall of the Kalasasaya complex. Source: Wikimedia Commons   One of the largest and longest-lasting cultures in the Andes was the Tiwanaku. Despite being one of the most important civilizations in the history of the Americas, relatively little is known about its people. It is clear that they controlled a vast region that stretched across parts of Peru, Bolivia, Chile, and Argentina. There is debate, however, as to whether it functioned purely as an empire or using a confederated model.   Historians who endorse an empire structure believe that Tiwanaku’s people expanded and conquered their neighbors similarly to the Inca. On the other hand, the confederation model suggests that peoples made a deliberate decision to affiliate themselves with the Tiwanaku culture and adopt its customs, beliefs, and artistic style. If this were the case, these peoples would have retained much control of their own government and the freedom to disassociate themselves from the confederation. Either way, it is not known what language the people who inhabited the city spoke or if they have descendants today.   The city was founded around 110 CE; however, it didn’t see major growth or expansion until 600 CE. Around this time, many of its largest structures were built, and its distinctive cultural style developed. As well as incorporating other Andean peoples into its sphere of influence, a number of direct colonies were created in parts of Peru and Chile. These new settlements were formed by the Tiwanaku people themselves, rather than consisting of outsiders who had accepted their influence, but their purpose is unknown.   The Ponce Monolith. Source: Wikimedia Commons   Their culture drew on the shared Andean elements which defined its predecessors and contemporaries. Like those other civilizations, the Tiwanaku people created elements of their own as well. These included a distinct style of pottery and architecture as well as innovative farming methods. To combat the extreme conditions of the Altiplano, and to feed their growing population, the people of Tiwanaku built raised platforms on which to plant their crops. Between these they dug canals, which not only provided water in this arid landscape but helped combat frost. They also carved terraced fields out of hillsides to expand the area of suitable farmland available to them. This technique was famously reutilized by the Inca in places like Machu Picchu.   Side-by-Side: The Tiwanaku and Wari Cultures A typical Tiwanaku style four-cornered hat. Source: The Metropolitan Museum   One of the most intriguing features of the Tiwanaku civilization is their relationship with their Wari contemporaries. The Wari built their own great city, and between them, the two factions controlled almost the whole of the Andean region. Tiwanaku influence was concentrated in the highlands—mostly to the south, while the Wari focus was to the northwest—along the coast of Peru. There are remarkable similarities between the two states, including in their textile designs, suggesting some level of cultural exchange. There are enough differences in their buildings and artifacts, however, to be sure that they were separate cultures.   Like the Tiwanaku, scholars don’t know if the Wari built an empire by force or created a culture that others willingly embraced. Whichever is the case, they did so almost simultaneously to Tiwanaku, and the two civilizations seem to have come to an end at the same time as well. Being part of the same Andean world, their cultures shared some features, but the differences in their architecture and pottery allow scholars to distinguish them as separate entities. Without knowing whether they were expansive empires or not, it remains unclear whether they ever came into conflict.   Both the Wari and the Tiwanaku civilizations seem to have collapsed around 1000 CE, having flourished for 400 years—about four times as long as the Inca empire. Their decline is no less mysterious than the rest of their history. It is unclear why both cultures started to disappear from the historical record but no new empire appeared which could have displaced them. The area surrounding Tiwanaku did suffer a severe drought around the time in question, and this was once thought to be the cause of their decline. Recent studies, however, suggest that this may have occurred soon after Tiwanaku’s collapse, ruling it out as a cause. There is evidence of destruction at the site, including burnt buildings and toppled statues. Whether these acts were carried out by unknown outsiders or by the population itself is unclear.   The Tiwanaku Ruins Tiwanaku’s Kalasasaya. Source: Wikimedia Commons   The ruins of the Tiwanaku capital sit high on the Bolivian Altiplano, 3,850 meters (12,600 feet) above sea level. The land at this altitude is barren and empty, with yellow grasses being the only significant plant life. Visitors may find themselves struggling to breathe the oxygen-deficient air and shivering from the biting cold. Within sight of the complex is Lake Titicaca, the highest navigable lake on earth and one of both Bolivia’s and Peru’s most famous attractions. This location gives the site a dramatic feeling, and the hostile environment makes the fact that this great civilization developed here even more intriguing.   The remains of the city are spread out over four square kilometers (2.5 miles), and at its height, it may have been home to as many as 20,000 people. Much of its expanse is unexcavated, and the site has suffered from looting over centuries—a sadly common occurrence to which even the most prestigious institutions are sometimes linked. This has meant that only the grandest buildings in Tiwanaku’s central core have been restored, and there are still many unanswered questions about its original layout. While some elements of the restoration work required the use of educated guesses, it is clear that the original builders wanted to make a statement through their monumental architecture.   Much of the stone used to build Tiwanaku came from the shores of nearby Lake Titicaca. Source: CNN   Like many American civilizations, the people of Tiwanaku liked to build pyramids. The largest in the complex is the Akapana Pyramid. Restoration work has not taken place, and unfortunately, much of its stone was taken away to be used in the construction of later buildings elsewhere. Visitors, however, can still view the remains, which take the form of a large mound that overshadows the rest of the site. It is aligned to the cardinal directions, and archaeologists believe that it consisted of six steps in the shape of an Andean cross. Its function is still a mystery, as are the purposes of many of its features. A sunken court was built on its summit alongside a basin for collecting rainwater. Inside the pyramid lies a network of channels, shafts, and weirs for controlling the flow of this water, allowing it to run into a moat that surrounds the structure.   The majority of Tiwanaku’s monumental buildings take the form of raised platforms or sunken courtyards. The most imposing is the Kalasasaya—a name which roughly translates to “the standing stones.” This two-tiered platform is 120 meters (390 feet) long and 120 wide, making it the structure that occupies the most space at the site. Before its retaining walls were reconstructed, only the vertical pillar stones were still standing, which is why Tiwanaku is sometimes referred to as the Stonehenge of the Americas. Today, the gaps between these columns have been filled in as they would have originally been, and the resulting walls showcase the advanced masonry techniques that the culture perfected. The Inca were also famous for their stonework, and although their methods were different, it seems likely that they drew some of their knowledge of the subject from this tradition.   The Gateway of the Sun. Source: Berkeley ORIAS   As with much of the site, Kalasasaya’s purpose is a mystery. Archaeologists think that the sunken courtyards that surround it were probably temples, but little more than that is known. Protruding from its walls are intriguing carved faces, each one unique. The identities of the people depicted by the monolithic statues dotted between them are also unclear. Their figures appear based on human forms but are decorated with animals such as fish, cats, and birds. Based on their alignment with surrounding mountain peaks, some scholars have argued that they represent the living spirits of those mountains.   The most photogenic of Tiwanaku’s monuments are the two gateways dedicated to the moon and the sun. The Gateway of the Sun appears to be the more important of the two, being larger and decorated with more elaborate carvings. Standing in the center of the lintel is a figure that archaeologists have had no trouble identifying—with his two staffs, the Andean creator god Viracocha is instantly recognizable. Among the most important of the region’s deities, he was popular across many different civilizations, including the Inca. Here, he is surrounded by neat rows of anthropomorphic figures.   The gateway was found cracked in half and partially collapsed, and so, like much of the site, it has been restored. This was done at the place where it was discovered, but there is disagreement about whether this is the position it occupied when the city was inhabited. The answer to this question has important ramifications for understanding the purpose of the gateways. Some believe that they formed physical parts of a calendar system and that their alignments with the sun and moon helped the people of Tiwanaku measure the passage of time.
Like
Comment
Share
History Traveler
History Traveler
6 w

Colonialism in Tasmania, Australia (What You Should Know)
Favicon 
www.thecollector.com

Colonialism in Tasmania, Australia (What You Should Know)

  British colonialists arrived in Tasmania, Australia (at the time known as Van Diemen’s Land) in 1803. Today historians have demonstrated that in 1803, the Aboriginal population counted between 6,000 and 8,000 people and up to 100 clans. The exact number is impossible to determine, but Brian Plomley (1912-1994) has identified 48 of them. From the arrival of the first settlers to the first massacres, and from the massive pastoral invasion of the late 1910s to the establishment of Aboriginal missions at Flinders Island and Oyster Cove, Tasmania truly is, to put it with historian Lyndall Ryan in her Tasmanian Aborigines, “the best place to understand the dreadful impact of settler colonialism on Aborigines across Australia.”   Tasmania, Before 1803 Bay of Fires in Tasmania, home to the North East nation, photograph by Spencer Chow, 2020. Source: Unsplash   Before the arrival of Europeans in 1803, Aboriginal people had inhabited, survived, and thrived on Tasmanian land for at least 40,000 years. Back then, the island was still connected to mainland Australia by a land bridge which was eventually submerged with the rise of sea levels. It was only around 6,000 years ago that Aboriginal clans began occupying the island’s east coast and the interior, settling along the many rivers around the island’s thousands of lakes — “the north-east section of the Central Plateau alone has about 4,000,” Ryan writes in Tasmanian Aborigines.    Women were tasked with collecting berries and vegetable roots (which they did by using wooden digging sticks), as well as hunting wombats, possums, and other small animals like rats, penguins, and bandicoots. Women from coastal clans would dive to great depths to collect crayfish, mussels, and abalone, while their male counterparts used wooden spears to spear scale fish and stingrays, and hunt seals, emus, kangaroos, and wallabies.   They hunted kangaroos relying on firestick farming techniques, which also allowed them to manage the plains. Almost every part of the animal was used.   Blacklip Abalone, women from coastal clans would dive to great depths to collect abalone. Source: Australian Museum   Ochre was their sacred color, used in ceremonies and as a gift. It was mined predominantly at Mount Housetop, Mount Vandyke, St Valentines Peak, and Gog Range, on lands belonging to the North Nation. Corpses were usually decorated with ochre (and clay) before being wrapped in leaves, feathers, and/or animal skins, depending on the person’s clan.   Upon contact, Aboriginal Tasmanian society was organized into nine separate nations which today are known exclusively by the names British colonialists assigned them. Each nation was formed by several clans with similar cultural practices. They would speak the same language (or dialect), live in contiguous regions, and share similar seasonal movements. The clan was the basic social unit at the heart of Aboriginal society.   After 1803 and Before the Pastoral Invasion  Convicts writing letters home at Cockatoo Island in New South Wales, drawing by Philip Doyne Vigors, 19th century. Source: National Museum of Australia   The first years of colonization, from 1803 to 1807, were marked by a mixture of relatively friendly encounters and brutal clashes. Interactions between settlers, Aboriginal clans, and escaped convicts (also known as “bushrangers”) were inevitably underscored by misunderstandings and uncertainty. To put it with Ryan, “the Aborigines’ appropriation of dogs, the colonists’ appropriation of Aboriginal children and the bushrangers’ appropriation of Aboriginal women led to fraught relations between all three groups.”   The first large-scale massacre took place on May 3, 1804, at Risdon Cove. Historians consider it the “founding massacre” in the history of colonial Tasmania. Justifying his murderous actions with lies, Lieutenant William Moore ordered his men to fire on a group of people from the Leenowwenne and Pangerninghe clans from the Big River Nation. They were unarmed, carrying only waddies, and on their autumn migration to the coast.   The Lady Nelson, commanded by Lieutenant Bowen to settle the Derwent River. Source: National Museum of Australia   1807 was the year everything changed. Violence escalated, rapidly and brutally. Within 20 years, Aboriginal Tasmanians were almost wiped out. In November 1807, more than 100 settler families (that is, more than 600 people overall) arrived in Hobart. Over the course of a few years, they set up numerous farms along the shores of the Derwent, Coal, and Browns River, at Patersons Plains, and New Norfolk. These areas were part of the ancestral lands of the Mouheneenner clan of the South East nation. In just seven years, they had taken control of ten percent of the island and dominated the sealing and whaling industries. By 1820, their occupation had expanded to cover 15 percent of Tasmania.   Although some interactions remained friendly, with chiefs exchanging kangaroo skins for colonial products such as tea, flour, tobacco, and dogs, in several instances sealers kidnapped Aboriginal women, especially from the North West and East nations.   A large Tasmanian canoe on the eastern shore of Schouten Island, engraving by Charles-Alexandre Lesueur. Source: National Museum of Australia   In 1815, sailors and sealers established permanent settlements on various islands in the Bass Strait, on Preservation Island, Gun Carriage Island, and Clarke Island. Here, they lived, married, and had children with Aboriginal women, who took the name of tyereelore, “island wives.” It only took these women a couple of years to become the backbone of their community.   Ryan writes that “they fed the community by training the dogs to track down wallabies, while they climbed trees to catch possums and dived for kelp and shellfish. To keep the settlements economically viable, they dried and cured seal and kangaroo skins and made baskets and necklaces for sale in Launceston; and to keep their own traditions alive, they sang, told stories of their people and performed ceremonial dances.”   Tasmanian necklace created by Aunty Dulcie Greeno and made of collected shells. Source: National Museum of Australia   The so-called “Straitsmen” and their Aboriginal wives, and children are the most vivid example of a different kind of cross-cultural, peaceful interaction, a unique case where different cultures met and thrived. They spoke Aboriginal English and often wore a mixture of Western and Aboriginal clothes.   Meanwhile, in the Van Diemen’s colony, massacres continued, along with child abduction. Most of them were raised to live a life of servitude. In 1818, the Hobart Town Gazette began to address the colonial treatment of Aboriginal people and inquired who was to be considered responsible for their suffering. Just a few years later, the Black War began.   A Different Kind of Invasion Cradle Mountain in the Central Highlands region is home to the Big River and North nations, photograph by Laura Smetsers, 2018. Source: Unsplash   The first wave of free settlers landed in Van Diemen’s Land in the early 1820s. The group consisted of members of the British (English, Scottish, and Irish) landed gentry, retired army and naval officers, and groups of sons of colonial officials previously stationed across the British Empire. Most of them were accompanied by their families.   The numbers provided by Lyndall Ryan are astounding. In 1823 alone, “more than 1,000 land grants totalling 175,704 hectares were made to the new settlers, the largest alienation of land in a single year in the entire history of Tasmania. By 1830 nearly half a million hectares had been granted. Between 1816 and 1823 the sheep population increased from 54,600 to 200,000 and by 1830 it had reached one million, surpassing for a short time the number of sheep in New South Wales.” With sheep came fences. With fences came huts and stone walls. With huts came homesteads.   General chart of Terra Australis or Australia, by Matthew Flinders, 19th century. Source: National Museum of Australia   Van Diemen’s Land was in the process of becoming a colony centered on the pastoral economy. Settlers were now permanently occupying the lands of the Big River, North, North Midlands, and Ben Lomond nations which became known as “the Settled Districts.” In May 1824 Lieutenant-Colonel Sir George Arthur (1784-1854) was appointed governor of the colony. An unusual man, he was to hold the position until 1836.   Born in Plymouth, England, he had served with the 35th Regiment in Egypt, Sicily, and Calabria, before becoming assistant quartermaster general in Jamaica in 1812. For eight years, starting in 1814, he was Lieutenant Governor of British Honduras. An honest opponent of slavery, he believed that Aboriginal people could be “saved,” and that they could improve their current situation because they had the skills to do so. All they needed to do was to embrace Christianity (thanks to the help of the Europeans, of course) and surrender their lands.   Tasmanian tigers in captivity, the extinction of Tasmanian tigers (or thylacine) was a direct consequence of British colonization. Source: Museums of Victoria   Sir George Arthur was confident that his double goal of “civilizing” Aboriginal people and establishing a flourishing colony could in fact become a reality. Only two years later, on November 29, 1826, to facilitate their surrender in the Settled Districts region, he issued a government notice that effectively set the stage for the Black War. Pastoralists, settlers, and convicts could legally kill Aboriginal people when found attacking their property or cattle. They did. The law was on their side.   The Black War and the Black Line Aboriginal people in Van Diemen’s Land, painting by John Glover, 1840. Source: Louvre   In 1826, more than 3,000 settlers and convicts arrived on Van Diemen’s Land. It was the largest number since 1803. Most of them settled in the Campbell Town District, on the traditional hunting grounds of the Tyerrernotepanner clans of the North Midlands Nation. Prevented from hunting or gathering food on their ancestral territories, Aboriginal groups grew hungry. They were reported entering and raiding huts looking for bags of wheat, salt, bread, flour, and blankets.   Following two years of massacres and killings, on April 19, 1828, George Arthur issued another proclamation. It divided Van Diemen’s Land into two sections, one specifically for the Europeans and the other for Aboriginal tribes so that they could be “civilized.” He also intended to engage in negotiations with Aboriginal leaders, mainly with the Kickerterpoller and probably the Umarrah from the North Midlands Nation. He was also open to the possibility of a treaty and seasonal passage through the Settled Districts.   Port Arthur, established in 1830 as a timber station and then a convict settlement. Source: National Museum of Australia   But once again violence soon escalated. Between August and October, the Oyster Bay, Big River, Ben Lomond, and North clans launched a series of attacks, one every two days, which killed at least 15 colonists. In October, for the first time, Oyster Bay people killed two women and two of their children at Lake Tiberias, probably in response to the killing of some Aboriginal women.   On November 1, 1828, George Arthur declared martial law against the (probably five) Aboriginal clans still operating in the Settled Districts. Aboriginal people were now officially enemies of the Commonwealth and could be shot on sight. Martial law remained in force for more than three years. A new phase of the Black War had just begun.   Arthur established small detachments of soldiers to protect the most remote settlements as well as military patrols, who had orders to scour the area and kill or capture any Aboriginal man, woman, or child they found.   Convict settlement near Gosford, New South Wales. Source: National Museum of Australia   In May 1829, a small troop of mounted police began assisting military patrols, now operating alongside private settler parties. Violence continued to escalate, with Aboriginal people spearing settlers (including women and children), burning down their huts, stealing flour and bread, and settlers responding by butchering Aboriginal groups at night in their camps (including women and children).   This outbreak of violence culminated in the so-called “Black Line.” In September 1830, Arthur devised a plan to drive Aboriginal people out of the Settled District. He called on every able-bodied man, free or convict, to form a human chain along with the military and police forces. Until the end of November, when the operation was called off, 2,200 settlers methodically scouted the island, advancing in a pincer movement, with the intent of driving the remaining Aboriginal men, women, and children into the Tasman peninsula, the designated place for an Aboriginal mission.   From Gun Carriage Island to Flinders Island Aboriginal people on Flinders Island, painting by John Skinner Prout, 19th century. Source: National Museum of Australia   The Black War ended with the surrender of Aboriginal nations across the island. It didn’t happen overnight. Instead, it was a gradual process facilitated by the joint efforts of George Arthur and George Augustus Robinson (1791-1866), his “conciliator” among Aboriginal people. Ryan describes Arthur as “the first colonial governor to grapple with what became the great moral dilemma of settler colonies in the Anglophone world,” that is, “should the British government permit the extermination of Indigenous peoples like the Tasmanian Aborigines by white settlers or should they be removed to a safe haven and ‘civilized’ into British ways?”   Robinson believed they could and should be “civilized.” Starting in 1829, he undertook extensive trips across the island, first among the South West, North, and North West nations, and later in the Settled Districts, to meet and try to convince Aboriginal people to relocate to specific areas allotted to them.   Between 1830 and 1834, Truganini, pictured here in 1869, accompanied Robinson on his missions across Van Diemen’s Land, photograph by Alfred Winter, 1869. Source: Wikimedia Commons   The first of these “safe havens” was Gun Carriage Island, a relatively small island between Cape Barren and Flinders Island, 57 kilometers (35 miles) off the coast of Van Diemen’s Land. In just a few weeks, the clans despatched there wasted away, succumbing to illnesses and lack of fresh food. The Gun Carriage Island plan was abandoned.   By January 1832, all Aboriginal clans in the Settled Districts had surrendered. The largest group (26 people from the Big River and Oyster Bay nations), led by Montpeliater and Tongerlongter, surrendered (peacefully) to Robinson on December 31, 1832. They were all taken to Flinders Island. Soon after, as it had on Gun Carriage Island, people started to become ill. Some of their leaders, including Umarrah, his wife Woolaytopinnyer, and Kickerterpoller, perished. Outside the Settled Districts, the North West and South West nations proved more difficult to convince.   Robinson and his men (including a group of Aboriginal people) had to use force to “bring them in.” Some were sent to Grummet Island, where many perished. Eventually, a group of remaining Ninene from the South West nation surrendered and was taken to Flinders Island, where the so-called Wybalenna Aboriginal Establishment had been set up in 1833 (it ceased operations only in 1847).   In 1835, Robinson became the superintendent of Wybalenna. The Establishment was formed by 112 Aboriginal men and women belonging to three distinct groups and led by seven chiefs. The largest group comprised 46 people from the South West and North nations (including Truganini from the South East nation). Another group was made up of people from Ben Lomond, North Midlands, and North East nations, while the smallest group comprised members of the Big River and Oyster Bay nations. Wybalenna served as the basis for assimilation programs across Australia.   Petition to the Queen  Policeman on a horse on Flinders Island, 1920s. Source: Furneaux Museum   Many important Aboriginal figures passed through the ordeal of Wybalenna and many died here of influenza and poor living conditions. William Lanney, for instance, arrived at Wybalenna with his family, one of the last to surrender, in 1842. To put it with Ryan, “They finally ‘gave themselves up’ in 1842 near the Arthur River because, they said, they were lonely.” Five years later, Lanney’s parents and two of his brothers were dead.   Wybalenna, however, also saw the emergence of important Aboriginal leaders and the beginning of Aboriginal activism on Tasmanian soil. Walter Arthur (1820-1861), his wife Mary Ann, and Davy Bruny, for instance, could speak and read English. They were aware of their legal rights and demanded payment for their work at the Establishment. Flinders Island, they maintained, belonged to them and it was the white man who was supposed to meet their demands, not the other way around.   The Conciliation, painting Benjamin Duterrau, 1840. Source: National Portrait Gallery   In December 1845, Walter Arthur, then aged 27, wrote to George Washington, an influential Quaker in Hobart, that his people on Flinders Island could manage themselves. They did not need commandants or superintendents. A few months later, on February 17, 1846, he and seven others petitioned Queen Victoria herself. Maintaining that they were “free” and that they had “freely” given up their country, they asked her not to have Jeanneret appointed again as superintendent, given his brutal methods.   The petition led to an inquiry. Lieutenant-Governor Denison decided to transfer the Aboriginal men and women from Flinders Island to their “final home,” an abandoned penal station at Oyster Cove, 30 kilometers (18 miles) south-east of Hobart on the western side of the D’Entrecasteaux Channel. They arrived there on October 18, 1847. They didn’t (and couldn’t) know that the penal station had been abandoned in 1835 because it had failed to meet convict health standards.   Tasmanian bark canoe, photograph by Rex Greeno. Source: National Museum of Australia   At Oyster Cave the death rate was astonishing. Deprived of their children (who had been taken to an Orphan School in Hobart), and living in cold and damp houses, some of the men and women stationed there succumbed to depression and alcohol. Others managed to adjust, working for settlers, hunting and collecting shellfish in the D’Entrecasteaux Channel. However, Ryan notes that “each time one of them died, they would leave the station for a period of time” before, inevitably, coming back.   In July 1871, after Mary Ann’s death, Truganini was the only woman still at Oyster Cove. She died in 1876. She was not, however, “the last Aboriginal Tasmanian,” as colonial propaganda has portrayed her for decades. Today the descendants of Fanny Cochrane Smith (1834-1905), Dolly Dalrymple Johnson (1808-1864) in northern Tasmania, and the Islanders community in the Bass Strait are ensuring the survival of Aboriginal culture in contemporary Australia.
Like
Comment
Share
History Traveler
History Traveler
6 w

How Edward I’s 1296 Invasion Sparked Scotland’s Long War for Independence
Favicon 
www.thecollector.com

How Edward I’s 1296 Invasion Sparked Scotland’s Long War for Independence

  In the spring of 1296, Edward I King of England invaded Scotland. For Edward, he was merely enforcing his suzerainty over his vassal, Scotland’s king, John Balliol, who Edward had helped raise to the throne. For the people of Scotland, however, the invasion became a threat to their nation’s existence and their personal freedom. This article will explore the origins and key moments of the 30-year-long war, as well as its leaders, tactics, and how it changed England and Scotland forevermore.   Prelude to Edward’s Invasion of Scotland: The Great Cause A stained glass painting of Margaret, the Maid of Norway, Lerwick Town Hall, at one point she was engaged to Edward, prince of England, had she survived and married Edward. Source: Geograph   In the early 1290s, Scotland was in political turmoil. Her last king, Alexander III, had died in 1286 and his only surviving heir, granddaughter Margaret the Maid of Norway, followed four years later. Soon many claimants were arguing over the crown in a crisis known as the Great Cause. To avoid civil war, the interim Scottish government, a council of nobles known as the Guardians of Scotland, invited England’s King Edward I, to choose the next king.   The idea was sound. Edward, as a foreign party, had no bias for any claimant, and they had all sworn to respect the final choice. However, Edward had a strong diplomatic relationship with Scotland, even planning to marry Margaret to his son. Also, though Scotland was an independent nation, many Scottish nobles held lands in England and paid homage to Edward for these lands under feudal law. There was, however, one small problem: Edward himself.   Edward, nicknamed “Longshanks” for his great height, was one of England’s most ruthless and ambitious kings, likened to a Leopard for his cunning and ferocity. He was a warrior from a young age, battling against rebellious barons and campaigning in France. Many historians speculate that he aimed to create a new Empire of Britannia under his rule. He had already conquered Wales when he received the request for arbitration. In one of the great ironies of British history, the man originally invited to save Scotland nearly destroyed it.   Edward I Moves on Scotland The Great Seal of Scotland, used by the Guardians to issue legal documents in the absence of a monarch. Source: Wikimedia Commons   Edward’s first response was to declare that choosing the next king would make him Lord Paramount, i.e. the feudal overlord, of Scotland, unless the Guardians legally proved otherwise. The Guardians prevaricated against this legal deviousness brilliantly, stating that only an anointed King of Scotland could legally recognize Edward as Lord Paramount.   Undeterred, Edward persuaded the claimants to pledge loyalty to him if made king. Truthfully, the choice really boiled down to two men. One was Robert de Brus, fifth Lord of Annandale, closest to Alexander III by blood and an old and wily political operator. The other was John Balliol, the most senior claimant by feudal primogeniture but younger and less politically experienced than Robert.   In November of 1292, Edward chose John, who formalized his oath of homage to Edward in his coronation. Edward wasted little time exercising his new dominance over Scotland. He demanded submission from all the Scottish nobles and regularly interfered in Scottish legal affairs, even ordering John to appear in court as a defendant against one of his own vassals.   Whether Edward was deliberately antagonizing John or was merely acting as an archetypal feudal overlord, John and his supporters soon reached their limit in early 1296. Edward ordered Scotland to provide levies and funds for his new war in France. Instead, John, alongside a newly elected council of Guardians of Scotland signed the Treaty of Paris, a mutual defense pact between France and Scotland, now known as the Auld Alliance. The ink on the treaty was barely dry before Edward would respond.   The First Invasion Carlisle Castle in Carlisle, the site of one of the first sieges in the war. Source: Geograph   Interestingly, instead of marching straight over the border, Edward’s first move was to offer John peace if he renounced the treaty, re-pledged homage, and handed over a few border castles. This might have been of dubious sincerity but either way, John responded by initiating hostilities. In March 1296, John’s army, led by his brother-in-law John Comyn, raided England and besieged Carlisle, then defended by Robert de Brus, sixth Lord of Annandale and the son of John’s rival claimant.   So why was a powerful Scottish lord fighting for England? Feudal customs and legal traditions made vassal autonomy and homage a complicated issue. With nobles holding estates on either side of the border, their ties of loyalty were not solely dictated by nationhood. The Brus family were a great Scottish house, but they had lands and familial ties in England, and plenty to gain siding with Edward. They were certainly not the only Scottish nobles to join Edward, some English nobles even sided with John, though they were rare given Edward’s strong rulership. At this stage, the war was less Scotland versus England, and more a factional feudal struggle for supremacy.   Meanwhile, Balliol’s military initiative ended swiftly and disastrously. Responding to Balliol’s raid, Edward crossed the border, sacked Berwick-upon-Tweed, Scotland’s richest city, and besieged the vitally important Dunbar Castle. Balliol hastily recalled his forces from Carlisle to relieve the fortress. However, this ended in disaster when his army was outmaneuvered and surrounded by the English, and the Scottish loyalist nobles were taken prisoner. Soon all the remaining nobles, Scottish strongholds, and even Balliol himself, followed suit.   Occupation and Popular Discontent A depiction of John Balliol, complete with a broken crown and scepter to display his subjugation and humiliation, 16th century. Source: Worldhistory.org   Edward then symbolically demonstrated his dominion over Scotland. John had the Scottish royal coat of arms physically torn from his clothes, he was thereafter known as “Toom Tabard” or empty coat, before being packed off into exile. Edward then seized the sacred Stone of Scone, upon which the Kings of Scotland were crowned, and had it put into a new coronation chair in Westminster Abbey. In addition to symbolic gestures, Edward also forced changes onto Scotland but in his ambition, he overreached.   He forced personnel upon the Church in Scotland, disbanded the Guardians of Scotland, and replaced almost every Scottish official and administrator with English ones. This angered Scotland’s senior clergy and alienated his noble supporters while strengthening his opponents and aggravating the common people, who were exploited by the English bureaucrats. The worst were Lieutenant Governor John De Warenne, and Treasurer Hugh De Cressingham, who brutally taxed the people of Scotland to enrich himself.   It was only a matter of time before resentment boiled over. The first rebellion began in 1297, in the Northern Highlands under the command of staunch Balliol loyalist Andrew Moray. Soon after, the most famous uprising began under the legendary William Wallace.   Rebellion and the Battle of Stirling Bridge Stirling Bridge, where Wallace and Moray won a stunning victory by ambushing the English army as they attempted to cross the narrow bridge. Source: Wikimedia Commons   Wallace’s rebellion began with the murder of a tyrannical English Sheriff. Soon many Scotsmen flocked to his side to make life hell for the English. The Scottish traditions of cattle raids and clan warfare, along with their ability to easily traverse difficult terrain, made them ideal guerilla fighters, harassing the English at will before disappearing into the hills.   De Warenne and De Cressingham, overseeing Scotland while Edward campaigned in France, charged their Scottish noble allies to deal with the rebellion. However, they made only token efforts to apprehend Moray or Wallace and by the summer of 1297, the two rebels had joined forces and much of the Scottish nobility had also revolted.   In response, the English officials raised an army roughly twice the size of Wallace and Moray’s rebels, moving north in September 1297. They brought the mutinous nobility to heel at the Capitulation of Irvine before moving on to meet Wallace and Moray outside the English-held Stirling Castle on the river Forth.   The English offered terms, but Wallace supposedly rebuffed them, saying “We are not here to make peace but to do battle and liberate our kingdom.” So, on September 11, 1297, the English marched across the river to meet the rebels. However, as half the English army struggled over the narrow bridge of Stirling, the rebels fell upon them. The Scottish Schiltrons, a dense formation of spearmen like the Classical phalanx, pinned the English to the riverbanks while blocking off the bridge, preventing any reinforcement. The English were slaughtered, De Cressingham was killed and, legend has it, his skin turned into a sword belt for Wallace.   Scottish Defense and Falkirk Statue of William Wallace on the righthand side of Edinburgh Castle’s gatehouse. Source: Geograph   Stirling was a stunning victory, but it came at a heavy price. Moray was grievously wounded and shortly afterward. Nevertheless, as 1298 dawned, the rebels, renamed the “Army of the Realm of Scotland,” liberated the rest of Scotland. Wallace, recently appointed as a Guardian of Scotland, led a raid into England to pressure Edward into submission.   Instead, an enraged Edward returned from France in April 1298, swiftly crossed the border and a desperate game of cat and mouse began. For nearly two months Wallace fought a brilliant guerilla campaign but Edward, far superior to the previous bumbling English commanders, cornered Wallace at Falkirk on July 22. There the English noble cavalry routed their Scottish counterparts while Welsh longbowmen rained death upon the Schiltrons of spearmen.   Wallace escaped but resigned as Guardian, yet all was not necessarily lost. Despite the victory, Edward couldn’t fully capitalize on his success due to a lack of supplies, and so returned to England. Meanwhile, Wallace looked for international support, persuading the King of France to threaten Edward out of attacking Scotland again. Meanwhile, two new Guardians were appointed: John “the Red” Comyn, and Robert de Brus, or “the Bruce” to differentiate from his forebears, the respective sons of the commanders at the siege of Carlisle.   This clearly shows how Scotland’s nobles were putting aside their differences to face a national threat. However, the Guardians’ bitter family rivalry and personal animosity proved insurmountable on the issue of either choosing a new king or preserving Balliol’s throne. Eventually, Robert, fed up with Comyn and the Balliol loyalists, defected to Edward who, having made peace with France, invaded Scotland in 1303.   The invasion force, which included the terrifying “Warwolf,” the largest trebuchet ever made, quickly overwhelmed Scotland. Edward, learning from his mistakes, promised greater Scottish autonomy and offered good terms to those who surrendered.   The Death of Wallace and Rebellion of the Bruce Painting of Wallace’s mock trial for treason by Edward I in the Hall of Westminster, 19th century. Source: Wikimedia Commons   Wallace, however, refused to surrender, continuing his guerilla war alone. Inevitably though, he was captured and charged with treason in a sham trial. His defense, that he never pledged loyalty to Edward, was ignored and in 1305 he was hanged, drawn, and quartered. “Thus, to all rebels!” Edward may have thought as Wallace’s remains were put on gruesome public display. However, the very next year, a new uprising blazed across Scotland, led by a previous English supporter.   Truthfully, Robert the Bruce had defected more out of hatred for Comyn than love for England. Behind the scenes, he limited his material support for Edward and quietly planned his own bid for the Scottish throne. Edward was certainly suspicious of Robert, but the Bruces were too powerful to be made enemies.   After Wallace’s execution, Robert tried mending things with Comyn, offering his own titles and lands for Comyn’s support for the crown. Ironically, Comyn’s response would, against his intentions, see Robert become king. Comyn leaked the deal forcing Robert to flee Edward’s court in London for Scotland. Robert then sought to negotiate with Comyn at Greyfriars Abbey in Dumfries. However, an argument broke out and Comyn was killed, either by Robert’s hand or by a servant at his request.   Robert could have begged Edward for mercy. Yet given what happened to the last man Edward declared traitor, Robert decided the die was cast on his behalf and doubled down as a rebel. Even though the Pope excommunicated Robert for murder on sacred ground, thanks to Edward’s previous mistreatment of the Church in Scotland the senior clergy fell in behind Robert. They absolved Robert of the murder and in March 1306, the Bishop of St Andrew’s crowned Robert king, even without the Stone of Scone.   The Civil War of Robert the Bruce Statue of Robert the Bruce on the left of the gatehouse of Edinburgh castle, opposite the other guardian, William Wallace. Source: Wikimedia Commons   Yet the odds remained very much against Robert. After losing the Battle of Methven, he was forced into hiding off the Scottish coast while his family was imprisoned and many of his supporters executed without trial. Legend has it that Robert was inspired to continue fighting while watching a spider patiently rebuild its web. If at first you don’t succeed, try and try again. Historically, Robert succeeded through adapting, cunning, and luck.   In February 1307, Robert returned to the Bruce heartlands of Carrick where he combined Wallace’s guerilla strategies with his own aristocratic prestige to rebuild support and weaken the English. In May, he won a brilliant victory at Loudon Hill which forced the English defensive and triggered more pro-Bruce uprisings across Scotland. Robert then moved on to a new challenge. Many pro-Balliol nobles joined England against Robert, while the Comyns still sought vengeance for the murdered John Comyn. To liberate his country, Robert needed to conquer it first.   Interestingly, despite his noble opposition, Robert appeared to have widespread popular support. He won several victories after the opposing forces deserted or mutinied instead of fighting their anointed king. The clearest example was at Barra in February 1308 CE. Here Robert defeated the Earl of Buchan, cousin to the murdered John Comyn, and unhelpfully also named John Comyn, when his army fled rather than face the Bruce.   Robert repaid this favor by committing the Harrying of Buchan, effectively torching the whole county to destroy Comyn’s power base. This atrocity is the starkest reminder that this was as much a civil conflict as it was one against English oppression. Speaking of the English, their surprising passivity during Robert’s civil conquest comes down to some very unfortunate (or fortunate depending on perspective) timing.   Edward II’s Response and Robert’s Rule The tomb of Edward I in Westminster Abbey, compared to some of the neighboring royal caskets, appears curiously plain, however, given the type of man he was, he needed little royal fanfare to be remembered. Source: Wikimedia Commons   In July 1307, Edward, marching to personally nip Robert’s rebellion in the bud, died of dysentery. The leopard Edward Longshanks, warlord and would-be emperor of Britannia left Scotland in open rebellion and his son, Edward II, to pick up his mantle.   Edward I’s epitaph reads: “Edward I, Hammer of the Scots.” An apt description, given all he had done to Scotland in just eleven years. However, at his death, the Scots were not yet fully beaten into submission. His son Edward II, ironically the first English king to be crowned on the Stone of Scone, simply lacked the tools to finally finish the job and properly nail Scotland. Edward lacked his father’s iron will and political ability to control his vassals, nor the funds, frittered away on his father’s costly wars, to finance a campaign.   Despite promising his dying father that he would end Robert’s rebellion, it took nearly four years before Edward could organize another Scottish expedition. All the while Robert strengthened his rule over Scotland, holding a parliament at St Andrew’s, creating a new government, and capturing remaining English strongholds. Edward II finally invaded again in 1311, but Robert simply responded with scorched earth and guerilla attacks.   Edward, lacking his father’s military aptitude, could not force a decisive battle and was forced home by a lack of supplies, funds, and brewing discontent back in England. It took three more years before, in June 1314, Edward could invade again. This time, he force marched more than 20,000 men to relieve Robert’s siege of Stirling Castle, one of England’s last strongholds in Scotland.   Bannockburn and the Irish Proxy War The earliest depiction of the battle of Bannockburn, from the Scotichronicon, 15th-century manuscript. Source: Wikimedia Commons   Despite having barely half Edward’s numbers, Robert anticipated Edward’s plan and deployed his Schiltrons to intercept the English vanguard on June 23. Robert almost died dueling an English knight, but the Scots held the field, forcing Edward’s exhausted army to camp in front of a river known as the Bannockburn.   Had Edward been half the general his father was, he would never have encamped so close to the Scottish line in such a dubious position after a forced march. As it was, when the Scottish suddenly attacked the next morning, the weary English struggled to respond. Just as at Stirling Bridge, they became trapped between the Scottish and a river. The flower of English nobility fell to either Scottish spears or the waters of the Bannockburn. Edward fled Scotland via ship, the other survivors struggled home overland or were hunted down by the vengeful Scots.   Bannockburn is perhaps Scotland’s most iconic military victory, as anyone who has heard Flower of Scotland can attest to. However, contrary to popular belief, it did not end the war but even so, the serious fighting was effectively over, save for one final fascinating campaign.   In 1315, Robert’s brother Edward took a Scottish army to join forces with the O’Neils of Ulster, to drive out the English from Ireland. The expedition began brightly, and Robert apparently made plans for a united Gaelic kingdom under the Bruce dynasty. However, the Irish support was limited, for they saw little difference between the English and Scottish occupiers and tragically Edward Bruce was killed in 1318.   The Treaty of Edinburgh Northampton and the War’s End A monument at the site of the Battle of Bannockburn where Robert allegedly planted his standard before the battle, the plaque contains a quote from the famous Declaration of Arbroath. Source: Wikimedia Commons   Despite losing his brother, Robert was not seriously weakened by the Irish venture. Over the next years, he and his nobility lobbied for international recognition.   In 1320, Scotland’s most powerful nobles wrote the Declaration of Arbroath to Pope John XXII. They urged the Pope to lift Robert’s ex-communication and recognize Scottish sovereignty and made a passionate commitment to their country:   “Because, while a hundred of us remain alive, we will not submit in the slightest measure, to the domination of the English. We do not fight for honor, riches, or glory, but solely for freedom which no true man gives up but with his life.”   This is a far cry from the squabbling Scottish from the 1290s. Undoubtedly, the war had brought Scotland together, though Robert’s suppression of any dissent to his reign also helped. Regardless, the Declaration helped persuade the Pope to lift Robert’s excommunication and recognize Scottish sovereignty, and France would renew the Auld Alliance soon after as well.   Miniature of John XXII, 13th century. Source: Wikimedia Commons   In 1327, Edward II was deposed in favor of his 13-year-old son Edward III under the regency of his mother. The new regime soon decided to cut England’s losses and agree to peace 14 years after Bannockburn, and 32 after the war began. The treaty of Edinburgh-Northampton recognized Robert as king and restored the borders to the status quo antebellum in exchange for £20,000.   Peace wouldn’t last, of course. After Robert died in 1329, John Balliol’s son Edward invaded with English support to replace Robert’s son, David on the throne. The First Scottish War was never as simple as Scotland unifying against England, as seen by the cause of the second war.   However, the First War’s transformation of Scottish sovereignty was profound. Edward Balliol eventually lost the Second War because of popular opposition to his submission to England. For all its twists and turns, the First Scottish War of Independence has become the story of the forging of Scotland’s identity.
Like
Comment
Share
History Traveler
History Traveler
6 w

Top 6 Books to Discover King Arthur’s World
Favicon 
www.thecollector.com

Top 6 Books to Discover King Arthur’s World

    The legends of King Arthur were extremely popular in the Medieval period, just as they are today. Countless Arthurian texts were written throughout Britain and Europe during the Medieval era, and thousands more have been written about Arthur in the modern era. With so much to choose from, if you are interested in learning about the real story, or rather the legend, of Arthur and his knights, where should you start? Read on for our top picks for the best six books to read to learn about King Arthur and his world.   1. Historia Regum Britanniae, by Geoffrey of Monmouth (Originally 12th Century) Manuscript of Geoffrey of Monmouth’s Historia Regum Britanniae, Peniarth MS 23c, folio 13r, c. 12th century. Source: National Library of Wales   This first recommendation is actually a medieval text, one of the primary sources for the Arthurian legends. It was written by Geoffrey of Monmouth in c. 1137, and it is generally known as the Historia Regum Britanniae, or The History of the Kings of Britain. This is frequently recommended to those who are just starting out in their investigation into the world of King Arthur. What makes this such a good starting point?   For one thing, this is the earliest surviving source, and it gives a detailed overview of Arthur’s whole career. Many subsequent sources are ultimately based on Geoffrey’s account. Furthermore, it is not overly long when considering just the Arthurian portion of the book. The Historia Regum Britanniae covers everything from the founding of Britain to more than a century after Arthur’s death. Additionally, while it was originally written in Latin, modern translations make it easy to read. It is not written in a difficult poetic style like many of the other primary texts.   2. King Arthur and the Knights of the Round Table, by Roger Lancelyn Green (1953) King Arthur and the Knights of the Round Table, by Roger Lancelyn Green, 1953. Source: Google Books   King Arthur and the Knights of the Round Table is a modern retelling of the Arthurian legends. It is primarily based on Thomas Malory’s Le Morte d’Arthur, but also draws from numerous earlier medieval accounts of King Arthur. Although originally intended for children, this has become a classic and is a valuable resource for anyone seeking to become familiar with the Arthurian legends. The intention of the author was to create a cohesive narrative of Arthur’s career, in contrast to Malory’s disjointed and difficult-to-follow text.   What makes this book so useful is that it presents essentially all the most famous elements of the legends, many of which are missing from Geoffrey of Monmouth’s Historia Regum Britanniae. For instance, it includes aspects such as the Round Table, the Lady of the Lake, the Sword in the Stone, and Lancelot. As such, it provides an excellent, easy-to-read overview of the Arthurian legends. This makes it very useful for anyone who is generally unfamiliar with the legends and wants to read about them without the struggle of working through the primary medieval texts.   3. The Age of Arthur, by John Morris (1973) The Age of Arthur, by John Morris, 1973. Source: San Francisco Books   This next book is rather controversial. The Age of Arthur was written by the historian John Morris in 1973. This is not a book that provides an overview of the Arthurian legends. Rather, in this book, Morris outlined his arguments for the historical truth concerning various people and events during the murky period between 350 and 650 CE. His purpose was to review what was really happening during the period that led to the legends of Arthur. Morris accepted King Arthur as a historical figure and attempted to use available sources to reconstruct a picture of his historical career. He did the same for various other individuals, such as Maelgwn Gwynedd and Tewdrig of Gwent.   Unfortunately, while becoming a very popular book among the casual Arthurian investigator, this book came under heavy criticism from Morris’ peers. It continues to be criticized to this day, although the reasons are arguably not as strong as they might first appear.   A stained glass window depicting the Venerable Bede, at Gloucester Cathedral. Source: Wikimedia Commons   There were two fundamental problems with The Age of Arthur that John Morris’ fellow historians highlighted. The first is that Morris was overly optimistic, almost to the point of gullibility, in accepting the claims of medieval texts. They argued that Morris lacked a critical eye, which led him to accept the historical accuracy of claims that had no solid basis. Secondly, Morris was criticised for sometimes just stating conclusions without backing them up.   It is important to remember that The Age of Arthur was written with a relatively casual reader in mind. It was never intended as a scholarly publication. As it happens, several volumes of Arthurian Period Studies present what is essentially a scholarly version of large portions of The Age of Arthur. These volumes include extensive references to primary sources as well as detailed explanations of Morris’s reasoning on various conclusions, including thoughtful arguments as to why he accepted certain sources as historically valuable. Therefore, while far from perfect, The Age of Arthur does present the reasoned conclusions of a professional historian of the period, albeit without all of his detailed reasoning.   4. Arthur’s Britain: History and Archaeology AD 367-634, by Leslie Alcock (1971) Arthur’s Britain: History and Archaeology AD 367-634, by Leslie Alcock, 1971. Source: Good Reads   Arthur’s Britain: History and Archaeology AD 367-634 was written by Leslie Alcock, a historian and archaeologist, in 1971. In many respects, this is very similar to John Morris’s The Age of Arthur, written around the same time. Alcock’s book presents his conclusions regarding what was actually happening in Britain during the period between 367 and 634 CE. As an archaeologist, Alcock focuses on the archaeological record. Rather than examining the medieval literary sources and attempting to reconstruct the careers of various figures in that period, Alcock was more focused on what life was like. He did, nevertheless, make use of the literary sources as well.   Unlike The Age of Arthur, Leslie Alcock’s Arthur’s Britain is not particularly easy to read. It is rather academic, which can make it difficult for the casual Arthur enthusiast. Still, for someone interested in learning in-depth information about Britain in the Arthurian period, this is a useful source.   5. The World of King Arthur, by Christopher Snyder (2000) The World of King Arthur, by Christopher Snyder, 2000. Source: Good Reads   Of all the books mentioned here, this one is probably the single best source for discovering Arthur’s world, as its very title suggests. The World of King Arthur was written by Christopher Snyder in 2000. Using both literary and archaeological sources, it examines the historical truth behind various aspects of the legends. Notably, Snyder does not present an argument for Arthur’s existence. On the contrary, this book does not present the view that he was historical.   However, the primary purpose of the book is not to examine what Arthur’s Britain was really like. Throughout The World of King Arthur, Snyder delves into the Arthurian legends themselves and explains how they evolved over the centuries. He even examines how they are portrayed in modern media. Furthermore, what makes this book such a useful source is that it presents the information in an easily digestible manner. There are copious photos, illustrations, maps, and other visual aids. It is an excellent source for learning about the world of King Arthur and the Arthurian legends.   6. The Reign of Arthur: From History to Legend, by Christopher Gidlow (2004) The Reign of Arthur: From History to Legend, by Christopher Gidlow, 2004. Source: Good Reads   Written in 2004, Christopher Gidlow’s The Reign of Arthur: From History to Legend presents an excellent and intelligent case for the historicity of King Arthur himself. Gidlow focuses primarily on medieval literary evidence, making extensive use of Gildas’s 6th-century De Excidio. This book outlines in detail how Gildas’s account of Britain in the 6th century is not only compatible with the Arthurian legends but also supports their historicity in many respects. The world of 6th-century Britain that Gildas presents, according to Gidlow, is logically reconstructed in a way that matches the world of Arthur seen in the legends.   Gidlow makes the argument that Arthur’s historicity is not just defensible but genuinely the best supported conclusion in view of the evidence. For anyone interested in the case for a historical Arthur, this book is invaluable. It directly addresses many of the arguments against his existence and attempts to dismantle them.   The Best Books for Learning About the World of King Arthur Gallos, a statue of King Arthur at Tintagel Castle, by Rubin Eynon, 2016. Source: Wikimedia Commons   In conclusion, these are some of the very best books that one could read to discover King Arthur’s world. Geoffrey of Monmouth’s Historia Regum Britanniae provides an overview of Arthur’s career as per the early legends. King Arthur and the Knights of the Round Table by Roger Lancelyn Green provides readers with an understanding of the more developed version of the Arthurian legends in a simple, easy-to-read format.   John Morris’s book, The Age of Arthur, presents an extensive overview of the world of King Arthur, based on Morris’s informed, though subjective, opinions. Then there is Leslie Alcock’s Arthur’s Britain: History and Archaeology AD 367-634, which looks at the archaeological evidence for what Britain was like during the Arthurian period. Christopher Snyder’s The World of King Arthur is surely the single best modern source for anyone interested in learning about the Arthurian legends themselves and how they evolved over the centuries. Finally, Christopher Gidlow’s The Reign of Arthur: From History to Legend presents an intelligent case for the existence of King Arthur.
Like
Comment
Share
Classic Rock Lovers
Classic Rock Lovers  
6 w

“I was supposed to play guitar on Sweet Leaf, then it was Changes”: Wolfgang Van Halen remembers meeting Ozzy Osbourne and reveals his original plan for Back To The Beginning
Favicon 
www.loudersound.com

“I was supposed to play guitar on Sweet Leaf, then it was Changes”: Wolfgang Van Halen remembers meeting Ozzy Osbourne and reveals his original plan for Back To The Beginning

The singer/multi-instrumentalist dropped out of Ozzy’s final show due to a schedule change, but he got to meet the Black Sabbath frontman at the Rock And Roll Hall Of Fame the year before
Like
Comment
Share
BlabberBuzz Feed
BlabberBuzz Feed
6 w

Joe Rogan Learns of Charlie Kirk’s Assassination
Favicon 
www.blabber.buzz

Joe Rogan Learns of Charlie Kirk’s Assassination

Like
Comment
Share
Living In Faith
Living In Faith
6 w

5 Postures for New Elders
Favicon 
www.thegospelcoalition.org

5 Postures for New Elders

Every week across the country, countless elders meet in rooms with harsh, hospital-inspired lighting to discuss everything from budgets to preaching to caring for the suffering. The majority of those pastors are in their roles on a volunteer basis. Lay elders who don’t draw a paycheck from the church face unique challenges. Cultural and procedural norms can be unclear. When should I speak up? Do I need to let this go? I’m a pastor, but I’m not the pastor, so what’s my role? The men around the elder table have varying degrees of experience, training, and wisdom. Inevitably, they’ll come up against something for which they’re radically unprepared. Shepherding a church isn’t plug-and-play. Godly elders are brothers desperately trying to love and serve God while loving, leading, and serving their local church—but it’s a challenge to know how to do that in any given situation. Usually, the answer isn’t obvious. Here are five postures to take as a new lay elder. 1. Keep Quiet and Speak Your Mind If you’re like me, you went into eldership with fresh ideas about your church—ideas you think everyone should immediately hear and heed. Reject this impulse. Instead, seek wisdom to know when (or if) to speak. If temperatures are running hot or you’ve circled the same topic several times in one night and you’ve made your point already, consider not speaking again. Ask yourself, How can I best love and serve these men and the church at this moment? Not trying to win a debate can often be the best option. Be wise; use discretion; be slow to speak and quick to listen. Sometimes an issue simply needs to be tabled for a while. Be wise; use discretion; be slow to speak and quick to listen. Sometimes an issue simply needs to be tabled for a while. On the other hand, if your conscience strikes you about an issue, or if you think silence will build bitterness in your heart, or you think the elders and the church would be helped by what you’re thinking and processing, say it. Don’t fall into the trap of saying nothing and then back-channeling your ideas after the meeting. This erodes the team’s confidence in their ability to assess ideas well. An atmosphere of awkwardness or fear can develop when other elders know you have thoughts and feelings but refuse to share them. Speak up in love—but only when the occasion calls for it. The paradox of keeping quiet and speaking requires wisdom (Eccl. 3:1, 7). This is why we need wise, godly elders. 2. Study the Elder-Room Culture The group of elders you joined has a culture. For better or worse, these men have rhythms and dynamics for how they relate to one another, how they get work done, who gravitates toward what topic, and so forth. Some groups are laser-focused on efficiency, while others can’t talk business until an hour or more has been spent on relationship building. If you’re new to an elder group, try to learn its culture. You’ll eventually influence these dynamics, but at first you’ll need to adjust to the existing way of doing things. Be encouraged that no one is at the elder table outside of God’s sovereignty; each individual will play a role in the culture. Pursue a Christlike culture by pastoring one another. This happens in all the same ways you disciple your congregants. You get into the Word together, share life, and pray with and for one another. You talk together. You laugh together, and you cry together. Brother pastor, find time to do these with your fellow elders. In larger elder boards, this can’t be done with everyone all the time, so find subsets of the whole with which you can connect. Invest in relationships with your fellow pastors. When elders dwell together in unity, it’s a blessing (Ps. 133:1–2). 3. Pursue Peace When Conflict Arises Pastors are also sinners, and, at some point, pastors will grow frustrated with their fellow pastors. Occasional frustration like this is normal in any relationship. But the Enemy and your sinful flesh will use any opportunity to breed more sin and division. If you’re getting angry with a fellow elder, talk to him in private—and quickly (Eph. 4:26). If you sense your brother has something against you, go and be reconciled as quickly as possible (Matt. 5:24). Don’t allow anger to fuel gossip or slander. Don’t allow it to twist your mind into assuming sinful motivations on behalf of that other elder. Assume the best (1 Cor. 13:7). Pastors should be increasing in holiness—but they often still struggle with pride and selfishness. It’s no surprise that conflict happens among elders; it’s a surprise that it doesn’t happen more. Pastors should be an example of how to handle such conflict. 4. Pray as a Powerless Pastor to Your Powerful God Eldership in Scripture largely revolves around four activities: teaching, preaching, prayer, and care. Prayer is often the most neglected. Yet without the Holy Spirit’s power, nothing we do will amount to anything. It’s God who gives growth (1 Cor. 3:6–8). Christ has given us access to the holy God of the universe, to ask and plead with him for help (Heb. 4:16). Elders need to regularly pray for their church members. Aim to do this daily. It’s often said that a member directory is the second most important book an elder owns. Pray for your members often, by name. Elders also need to regularly pray for wisdom, love, faith, and hope. These characteristics enable you to persevere in your calling as a church leader. It all comes from above. Prayer reminds you of your dependence on the Lord for everything. 5. Remember God’s Kind Gifts Eldership isn’t all difficulty and hardship. It’s also an incredible gift from God. You who have been saved by the Lord Jesus Christ get a front-row seat to the same work being done in others. The Lord will use pastors to bring people to himself for all time (1 Tim. 4:16). That includes the new elders—foolish and hopeful, sinful and saved, confused and cared for: you. Eldership isn’t all difficulty and hardship. It’s also an incredible gift from God. Who is worthy of these things? No one. But our Lord Jesus has designated some of his sheep to serve him in this way. Praise God for the opportunity to see him work: marriages saved, lost souls found by Jesus, men liberated from the chains of addiction, women freed from abuse—and on and on and on. What a privilege. This is what God does, and you get to see it. Soli Deo gloria. Pastors, particularly those who don’t work full-time for the church, are called to an often thankless job. They’ll endure anxious moments praying for lost sheep. They’ll wonder if they’re pastoring the right way. Whether you’re a pastor under those harsh halogen lights or a member praying for his or her pastors, remember that God delights to turn unseen faithfulness into eternal glory.
Like
Comment
Share
Living In Faith
Living In Faith
6 w

The ‘2 Roads’ Approach to Evangelism
Favicon 
www.thegospelcoalition.org

The ‘2 Roads’ Approach to Evangelism

Have you ever shared the gospel with someone and realized it just wasn’t connecting? We trust that God’s Word has the power to save (James 1:21) and that someone’s response to the gospel is based on the Holy Spirit’s work (1 John 2:20–27). Yet while we know that only the Spirit changes hearts, we can seek to make our gospel presentation one that engages the hearer’s comprehension and understanding as far as it depends on us. Our approach to sharing the good news of Jesus can thus significantly influence how it’s received, especially in today’s post-Christian cultural landscape. While there’s no one-size-fits-all approach that will always work, I want to recommend a framework that presents two powerful evangelistic pathways—the Romans Road and the Ephesians Road—and demonstrates how this combination can work together to create a more complete and compelling gospel presentation. The Romans Road has guided countless people to salvation through its clear explanation of sin, judgment, and redemption. Its straightforward approach has proven effective for generations. Yet many people today search for more than personal salvation; they long for meaning, identity, and purpose in a fragmented world. By thoughtfully combining approaches, we can present a gospel that both saves individuals and invites them into God’s story of cosmic renewal. This is where the Ephesians Road approach comes in. Developed by The Gospel Coalition columnist Trevin Wax, the Ephesians Road builds on the solid foundation of personal salvation by expanding our vision to see salvation within God’s grand cosmic plan. Wax’s approach addresses contemporary questions about identity, community, and justice while maintaining the biblical truths of grace and redemption. By thoughtfully combining these two approaches, we can present a gospel that both saves individuals and invites them into God’s story of cosmic renewal. This hybrid framework offers practical guidance for sharing this holistic gospel in ways that resonate deeply with modern listeners while remaining firmly rooted in biblical truth. What follows is a roadmap for evangelism that honors the gospel’s personal and cosmic dimensions—a presentation that speaks to head and heart, to individual and community, to present salvation and future hope. 2 Evangelistic ‘Roads’ To understand the “two roads” approach, we need to know what the individual “roads” are. The Classic Romans Road Let’s first look at the Romans Road, an approach supposedly invented by Jack Hyles sometime around 1970. It has four steps and relies on four verses from Paul’s letter to the Romans. Step Key Verse Emphasis  1. Universal sin  Romans 3:23: “For all have   sinned and fall short . . .”  Personal guilt  2. Sin’s penalty  Romans 6:23: “The wages of   sin is death . . .”  Deserved judgment  3. Christ’s provision  Romans 5:8: “While we were   still sinners, Christ died for   us.”  Substitutionary atonement  4. Necessary response  Romans 10:9–10: “If you confess . . . [and] believe . . . you will  be saved.”  Individual decision This four-step outline has introduced millions to the gospel. Yet by relying on a handful of decontextualized verses, it can shrink Paul’s sweeping argument to a me-centered transaction: “I sinned; Jesus paid; I decide.” This approach underrepresents the Bible’s corporate, cosmic, and kingdom dimensions. Trevin Wax’s Ephesians Road In his book Holy Subversion, Wax points out that while the Romans Road approach can be helpful (he’s used it himself), it’s lacking in certain areas. The deficiency of the Romans Road isn’t in the Scripture verses but in the disappearance of the framework in which these verses make sense. When the people around us no longer hold to a biblical framework from which to comprehend these truths, the Romans Road turns into a series of cobbled-together propositions disconnected from the story of Scripture. As Wax notes, “The presentation assumes that people know who God is, what God demands, who we are, what our problem is, and how God has acted in history to bring restoration.” In his book, Wax suggests walking people through the opening chapters of Ephesians instead: Mile Marker Key Point Gospel Horizon God’s cosmic plan Salvation is about God’s plan for the world, and the gospel is what he has done through Jesus of Nazareth in order to accomplish that plan (Eph. 1). Before creation, the Father purposed “to unite all things in [Christ]” (v. 10). Salvation begins with God’s agenda, not ours. This plan unfolds through God’s covenant promises to Abraham, Isaac, and Jacob, culminating in Christ as the promised seed through whom all nations would be blessed. God intervenes to save you Salvation comes only by the grace of God (Eph. 2:1–9). We were “dead in [our] trespasses . . . but God . . . made us alive,” highlighting sheer grace over human choice. You’re given a new calling and a new community Salvation comes with a calling that must be fulfilled within the community of faith (Eph. 2:10–22). Grace creates “one new man” (v. 15) and sends us out as God’s workmanship “created . . . for good works” (v. 10) within a reconciled community.   This approach recenters the gospel on Christ’s victory and the church’s participation in God’s renewing mission, rather than merely on personal life-after-death security. Why the Ephesians Road Resonates Today The Ephesians Road is more likely to connect with modern hearers: Cultural Challenge Romans Road Limitation Ephesians Road Advantage Identity crisis (Who am I?) Focuses on guilt/forgiveness but not identity. Begins with adoption “through Christ” (Eph. 1:5)—offering a stable, grace-given self-understanding. Hyperindividualism and loneliness Presents salvation as a private decision. Emphasizes incorporation into a new family and as “fellow citizens” (2:19). Story hunger (people long for a big narrative) Four isolated verses feel like proof-texts. Tells the Bible’s grand drama from eternity past through God’s covenant with Israel to the renewal of all things, showing how we as Gentiles are grafted into Israel’s story. Justice and reconciliation concerns Doesn’t address dismantling hostile divisions. Showcases Jew/Gentile reconciliation and peacemaking (2:14–16) as fruit of the gospel.   Think of the Romans Road like a straight path to salvation. It’s direct and clear about our need for forgiveness and shows you how to be saved from sin through the work of Jesus. The Ephesians Road is more like looking through a big picture window that shows the whole landscape of God’s plan. It still teaches that Jesus died to save us from our sins, but it places this truth within a broader context, including God’s bigger plan for the entire universe, our belonging to God’s family (not just being saved as individuals), and our purpose to participate in God’s work in the world. This bigger picture speaks powerfully to people today who feel disconnected and want to belong somewhere. Many younger people also care deeply about making the world better and more just and have a hunger for meaningful stories that explain life, rather than simply finding a ticket to heaven. While both approaches teach the same gospel, the Ephesians Road helps people see how salvation connects to the bigger questions of “Who am I?” “Why am I here?” and “How can I make a difference?” As Wax says, “It’s not so much that God has a wonderful plan for your life; it’s that God has a wonderful plan—and invites you into it.” Combine the Romans Road and Ephesians Road Both approaches can be beneficial in presenting the gospel. But they can be even more powerful when combined, with the Ephesians Road providing the meaning and broader context and the Romans Road providing the clear path to personal salvation. Here’s how they complement each other. 1. Begin with God’s Grand Design (Ephesians): Share how God had a beautiful plan from before creation—to bring everything in heaven and earth together under Christ (Eph. 1:9–10). Explain that we were chosen and loved before time began, designed for relationship with God and to reflect his glory in creation. Also, explain how this plan worked through God’s specific covenant with Abraham and his descendants, promising that through this chosen family all nations would be blessed—a promise fulfilled in Christ. 2. Explain the Universal Problem (Romans): Help people understand that all humanity has rejected God’s design (Rom. 3:23), resulting in broken relationships, suffering, and separation from God. The consequence of this rebellion is spiritual death (6:23) and eternal separation from our Creator. 3. Reveal Christ’s Complete Solution (Both): Show how Jesus’s death paid the penalty for our sin (Rom. 5:8) while also fulfilling God’s cosmic purpose to restore all creation (Eph. 1:7–10). His sacrifice addresses both our personal guilt and the entire broken world system. Through the cross, Jesus reconciles us to God and begins healing all the divisions in humanity. 4. Invite a Personal Response (Romans): Invite people to respond to this gift by believing in their heart and confessing with their mouth that Jesus is Lord (Rom. 10:9–10). Emphasize that salvation comes through faith. Be clear that our salvation depends on Christ’s work rather than on us earning God’s favor through good works. 5. Celebrate Our New Identity (Ephesians): Describe the transformation when someone trusts Christ. We’re made alive with him (Eph. 2:4–5), adopted into God’s family (1:5), and made part of a new humanity that transcends racial, social, and cultural divisions (2:14–16). We move from spiritual orphans to beloved children. 6. Embrace Our Kingdom Purpose (Ephesians): Show how salvation doesn’t just change our destination after death but gives us purpose now. We’re created in Christ for good works (2:10) and called to participate in God’s mission of reconciliation as his ambassadors. Our lives become part of the great story of God’s kingdom bringing healing to creation. This combined approach addresses both the individual need for salvation and the deeper questions of identity, belonging, and purpose that resonate with contemporary seekers. Power of a Holistic Gospel The Two Roads Framework can help us express the biblical message more fully. By combining the personal salvation focus of the Romans Road with the cosmic vision of the Ephesians Road, we offer unbelievers rescue and purpose, forgiveness and belonging. In our fragmented culture, where people struggle with questions of identity and meaning, this integrated approach addresses both the head and heart. It speaks to individual guilt while painting the grand picture of God’s kingdom coming to earth. It offers immediate peace with God while inviting people into the adventure of participating in his ongoing work. The holistic gospel we share through this combined approach isn’t just about getting people to heaven. It’s about inviting them into the greatest story ever told, where their lives can find ultimate meaning as part of God’s plan to restore all things in Christ. Addendum: Example Gospel Presentation Creating an example for how to combine these two frameworks is difficult since evangelism tends to work best as a dialogue, rather than a monologue. Still, it might be helpful to show what a combination could look like. This is intended as a presentation of the gospel for someone unfamiliar with the Bible (since he or she won’t know what “Romans” and “Ephesians” are, we can substitute “the Bible says” when referencing individual verses): Can I share something that’s changed my life and how I see the world? This is the core of my belief system, what we Christians mean when we talk about the “gospel,” or good news. I also believe that what the Bible says about God is true, so I’m going to share some of what it says about life and our world. Before anything existed, God had a beautiful plan. He created everything—including you and me—with purpose and love. His intention was for all creation to flourish in relationship with him and each other. God chose a specific people—Israel—through whom he would work out this plan. He made promises to Abraham that through his family, all the families of the earth would be blessed. The story of the Bible is largely the story of how God kept these promises. As the Bible tells us [in Eph. 1:10], God’s ultimate plan is to bring everything in heaven and earth together under Christ. However, something is obviously wrong with our world. As children of Adam, we’ve all turned away from God’s design. We all choose to live however we want to live rather than as God wants us to. The Bible also tells us [Rom. 3:23] that “all have sinned and fall short of the glory of God.” This isn’t just about breaking rules; it’s about a broken relationship with our Creator. This is what Christians mean when we use the word “sin.” And the Bible goes on to add [Rom. 6:23] that the natural consequence of sin is death. Not just physical death but also spiritual death. Spiritual death is an eternal separation from the life-giving God. But here’s why this is good news: God didn’t abandon his plan. While we were still living in rebellion, “Christ died for us” [Rom. 5:8]. What this means is that Jesus took the punishment we deserved and bridged the gap between us and God. That’s what the cross—the place of Jesus’s sacrifice—is all about. When Jesus died on the cross, he died in our place and paid the price that we couldn’t pay so we could be reconciled to God the Father. Jesus did this to save all those who put their faith in him. But he also died to restore God’s entire plan for creation. This is what we Christians refer to as salvation. Jesus saved us by paying the price for us and then giving us the benefit for free. We can’t earn our salvation or do anything to add to it. Salvation is a free gift. But it’s a gift that requires a response. We must accept the gift. The Bible [Rom. 10:9–10, NIV] explains how we do that: “If you declare with your mouth, ‘Jesus is Lord,’ and believe in your heart that God raised him from the dead, you will be saved.” It’s not about being good enough to earn God’s love or earn our salvation. It’s about accepting what Jesus has already done on our behalf. As Gentiles, when we trust in Jesus, we’re adopted into God’s covenant family—the same family he promised to Abraham. We become part of their story and inheritors of God’s promises to his chosen people in the Old Testament. When you put your trust in Jesus, something remarkable happens. According to the Bible [Eph. 2], God makes you “alive together with Christ” and adopts you into his family. You’re no longer defined by your past. You’re now defined by your new identity as God’s beloved child. And with that identity comes a new purpose and mission. The Bible says [Eph. 2:10, NIV] we’re “created in Christ Jesus to do good works, which God prepared in advance for us to do.” You’re invited into God’s ongoing work of healing and renewing this world. You become part of a new community that crosses all divisions—political, ethnic, ideological—and demonstrates God’s love to a broken world. So this isn’t just about getting to heaven someday, though it does mean that. It’s about joining God’s kingdom work right now, finding your true identity, and participating in the reconciliation of all things in Jesus. What’s stopping you from beginning this new life with God today? I’d be happy to pray with you or answer any questions you have about following Jesus. This combined approach maintains the clarity of the Romans Road while embedding it within the broader, more compelling narrative of the Ephesians Road. It speaks to both personal salvation and cosmic purpose, addressing the intellectual and existential questions of our time while remaining faithful to the biblical gospel.
Like
Comment
Share
Showing 5564 out of 96234
  • 5560
  • 5561
  • 5562
  • 5563
  • 5564
  • 5565
  • 5566
  • 5567
  • 5568
  • 5569
  • 5570
  • 5571
  • 5572
  • 5573
  • 5574
  • 5575
  • 5576
  • 5577
  • 5578
  • 5579
Advertisement
Stop Seeing These Ads

Edit Offer

Add tier


Select an image
Delete your tier
Are you sure you want to delete this tier?

Reviews

In order to sell your content and posts, start by creating a few packages. Monetization

Pay By Wallet

Payment Alert

You are about to purchase the items, do you want to proceed?

Request a Refund